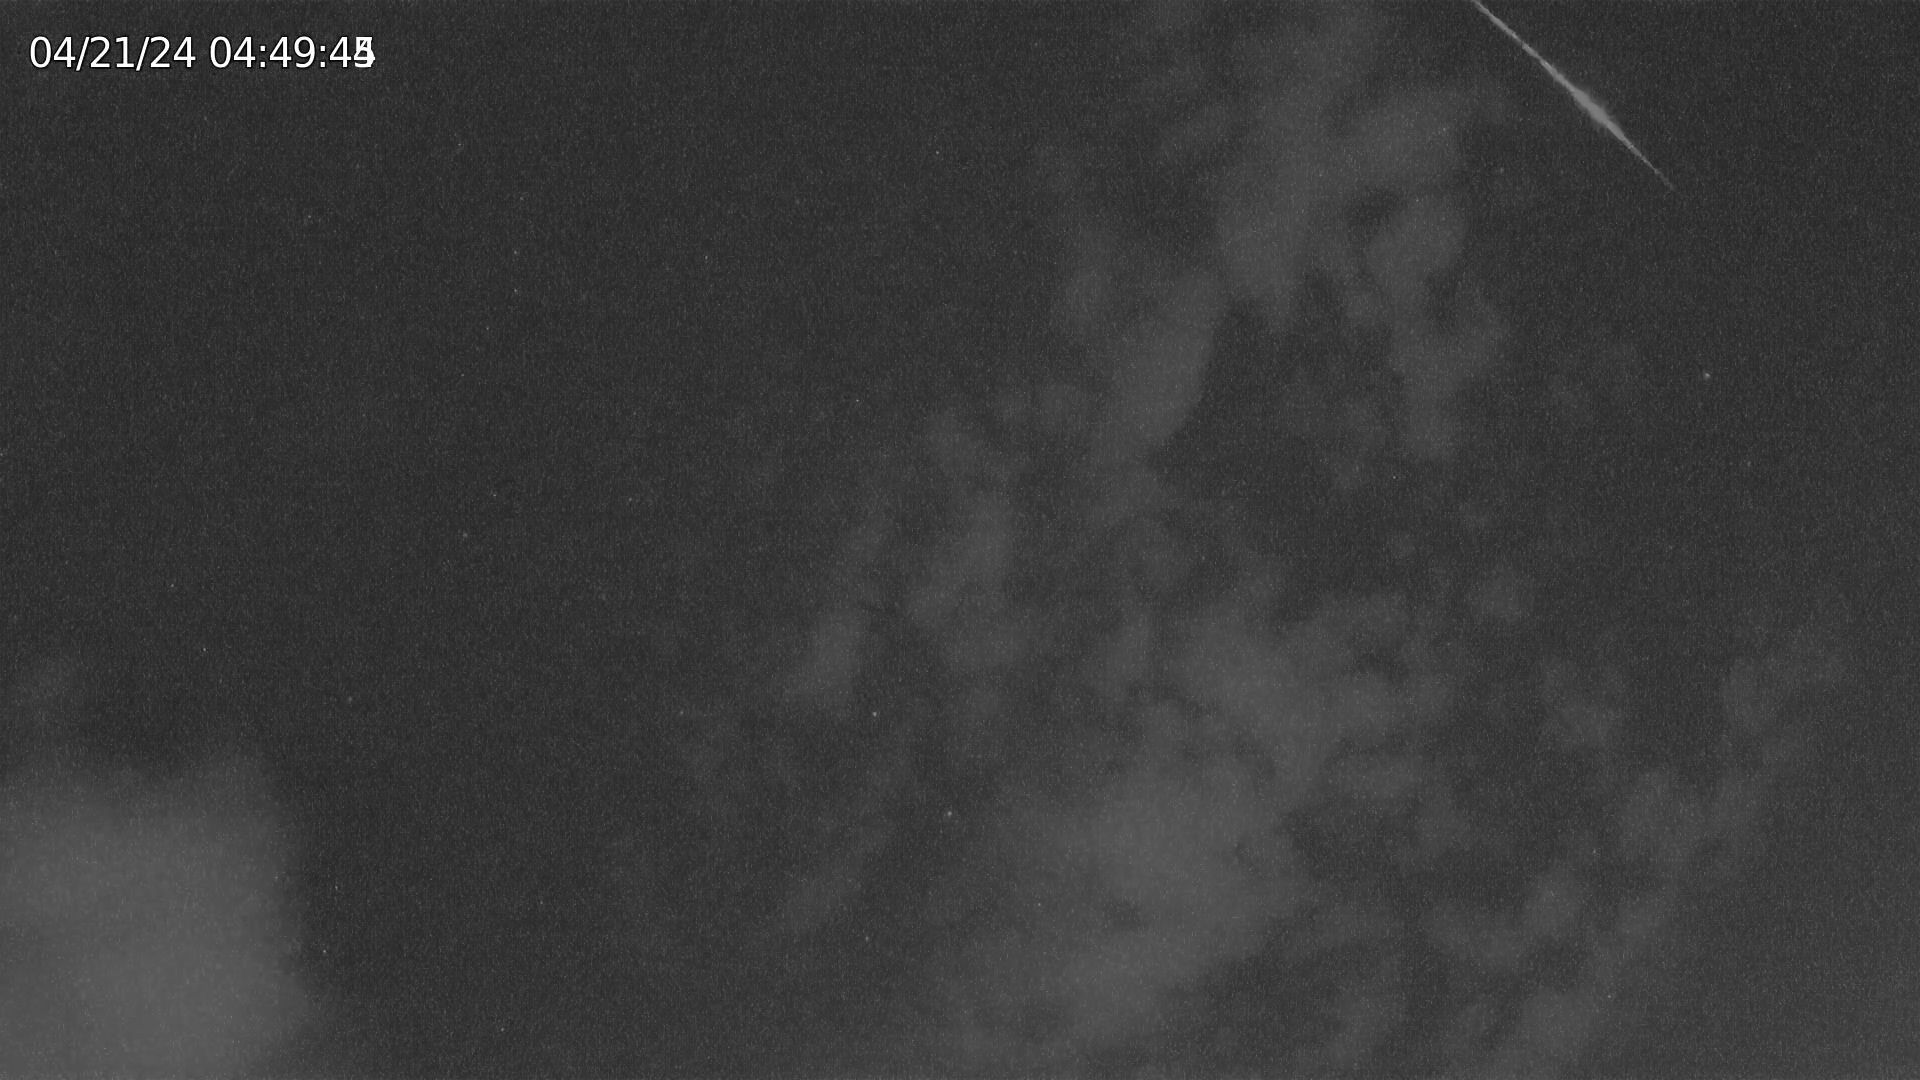
树莓派4B +IMX462+FFMPEG+meteor master ai 流星监控方案 不断更新
-
一、树莓派方案
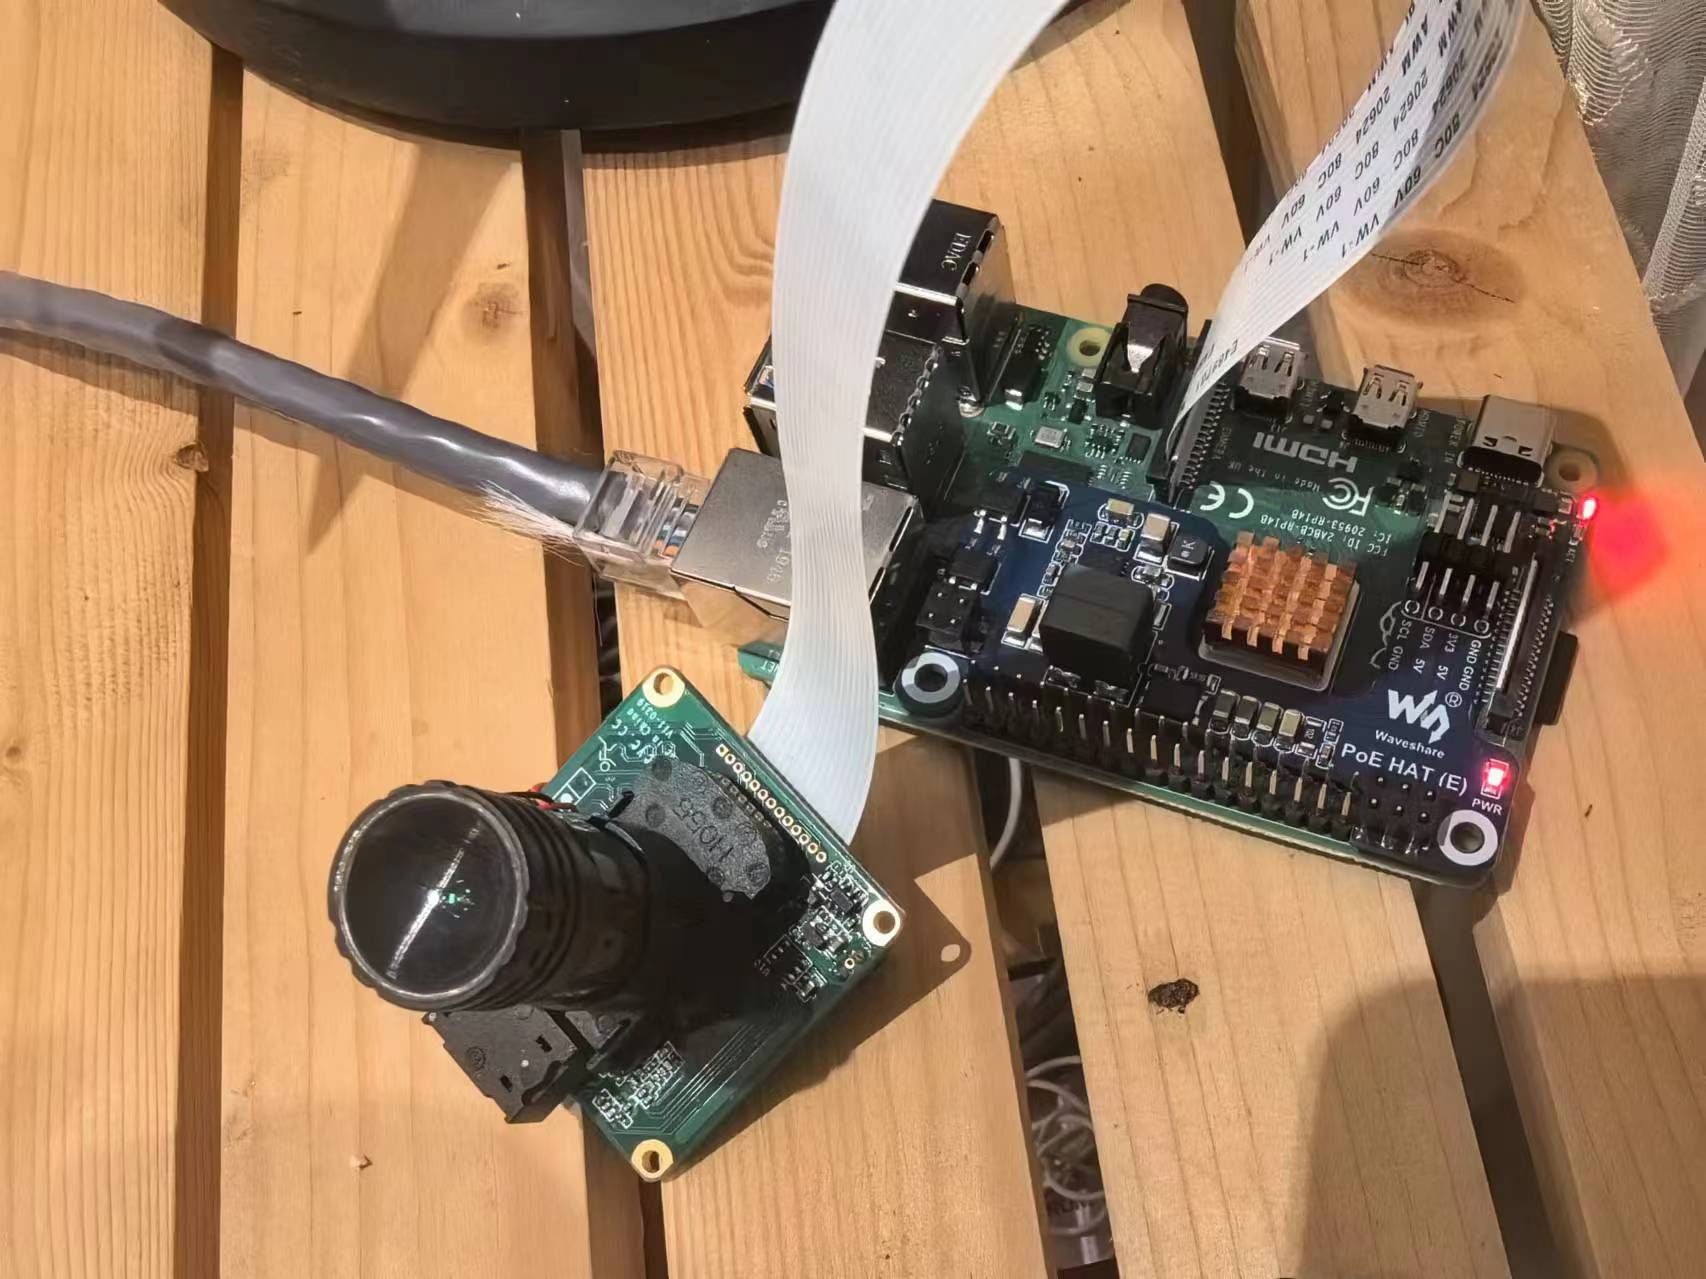
树莓派4B(加了POE模块) +IMX462+FFMPEG+meteor master ai 流星监控方案
流星监测参考地址一:https://globalmeteornetwork.org/wiki/index.php?title=Main_Page
流星监测参考地址二:李老师流星探测理论 https://blog.meteoroid.fit/preface.html
VEYE-MIPI-IMX462流星视频合集(不断更新):
-
镜头选择VEYE-MIPI-IMX462+树莓派4B
一、树莓派4B 安装软件
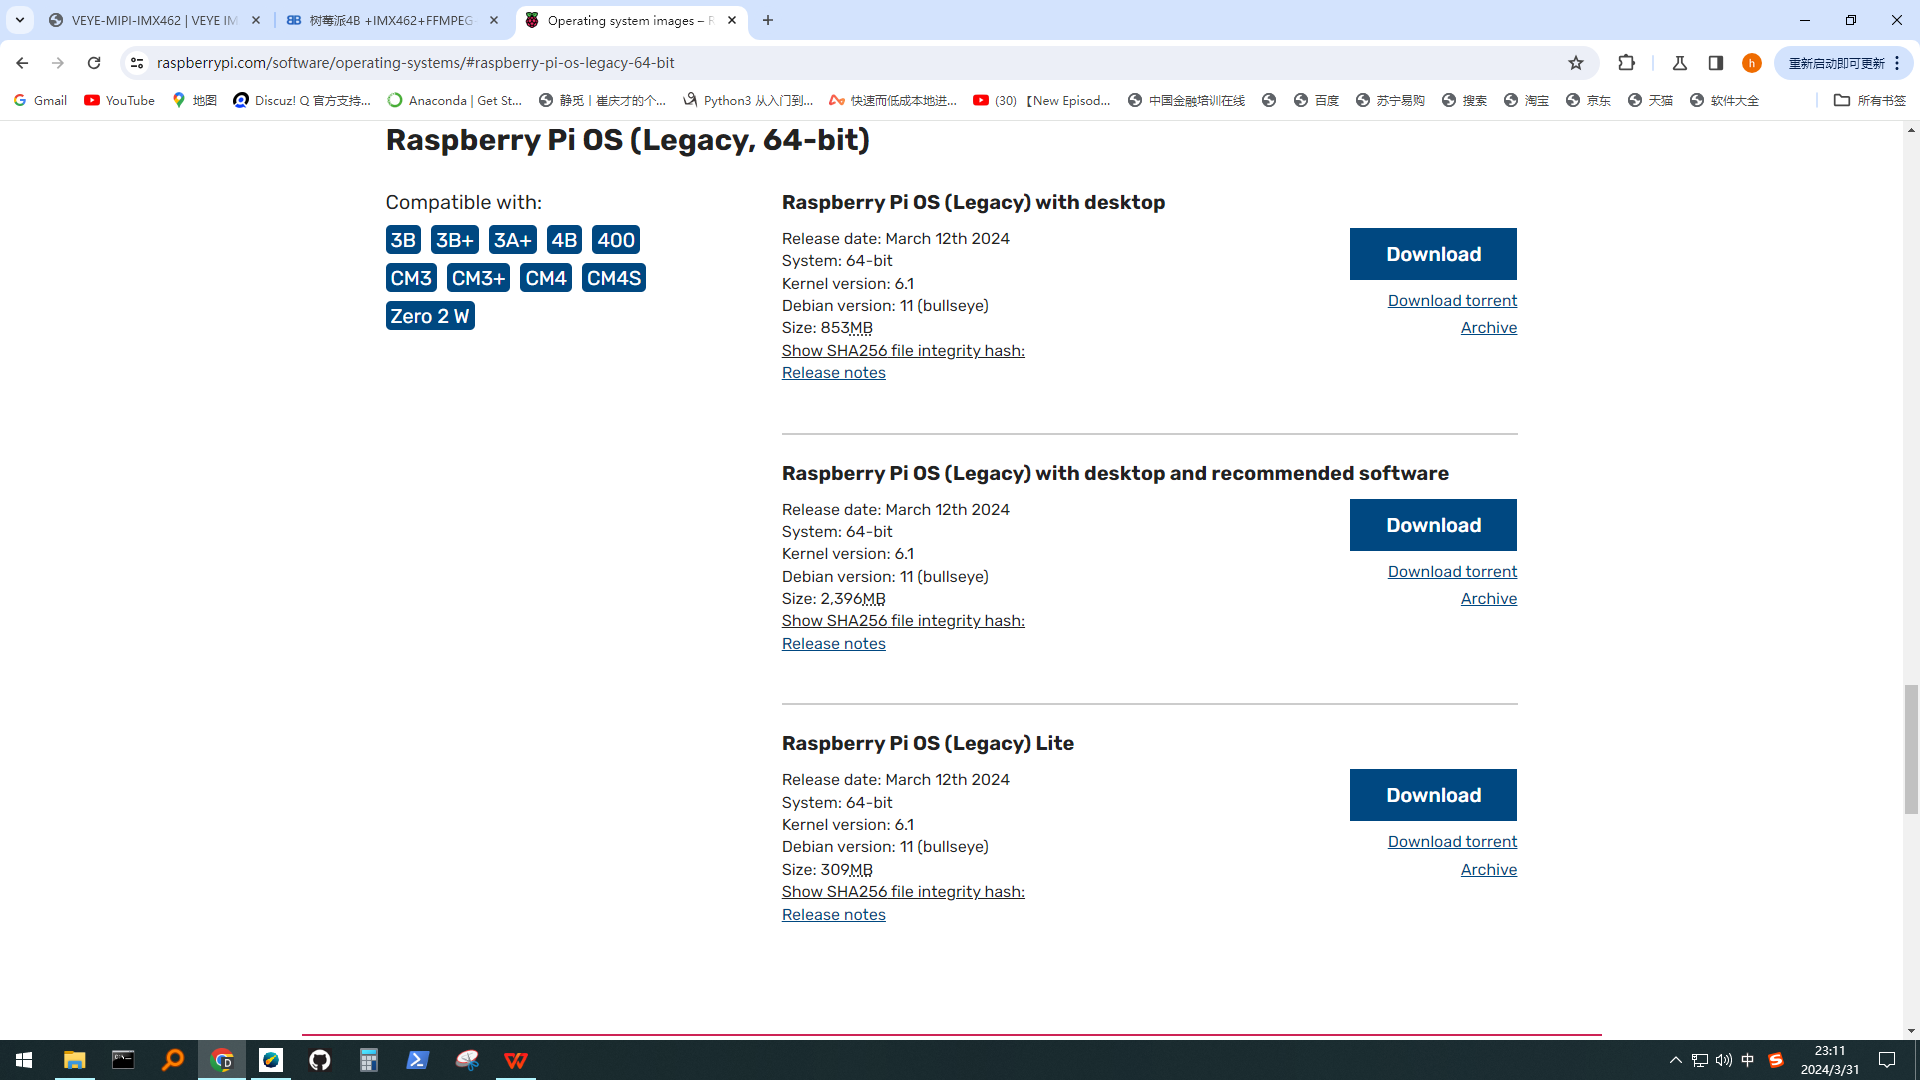
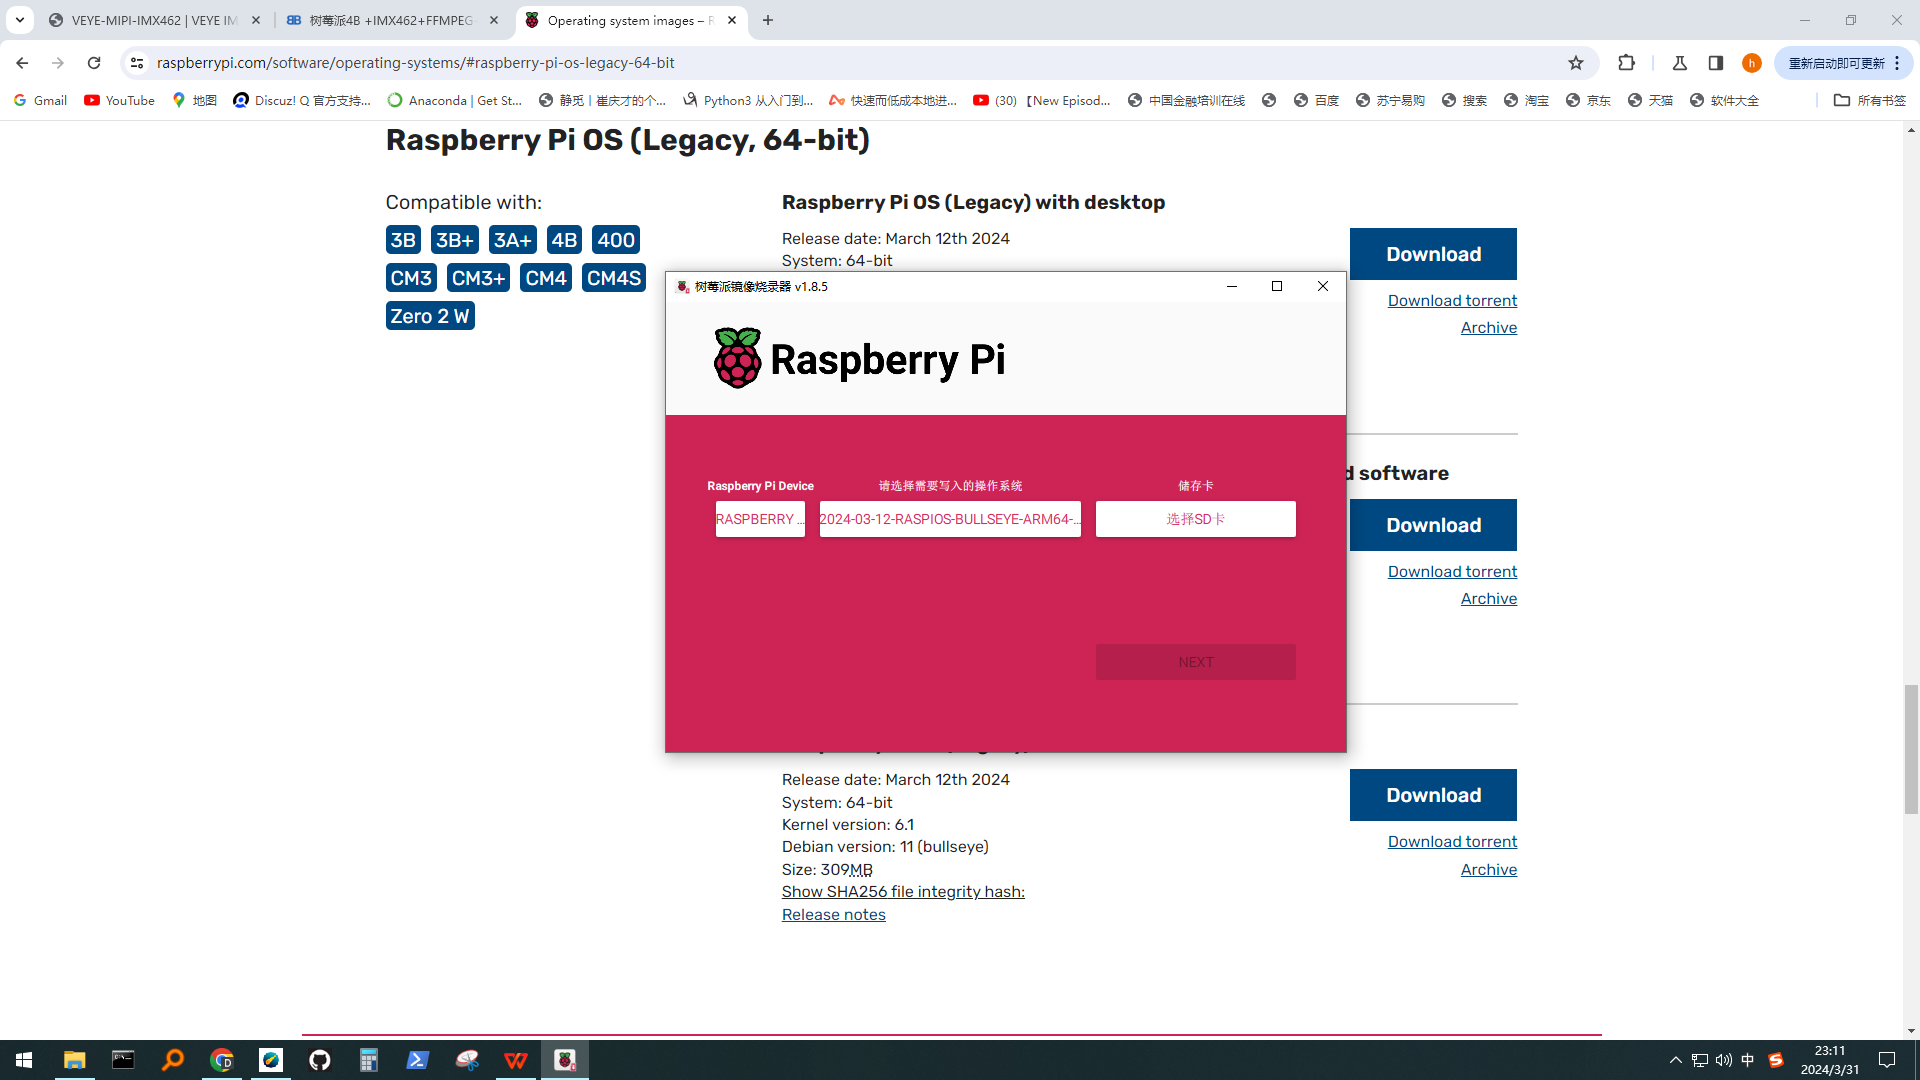
1、Raspberry Pi OS (Legacy) with desktop and recommended software
下载地址 https://www.raspberrypi.com/ 版本记得用Legacy,带有桌面和推荐软件,这个版本已经安装好FFMPEG
图片1
图片2
2、使用FinalShell登录树莓派
FinalShell
地址 https://www.hostbuf.com/
图片1 -
This post is deleted! -
二、安装镜头驱动
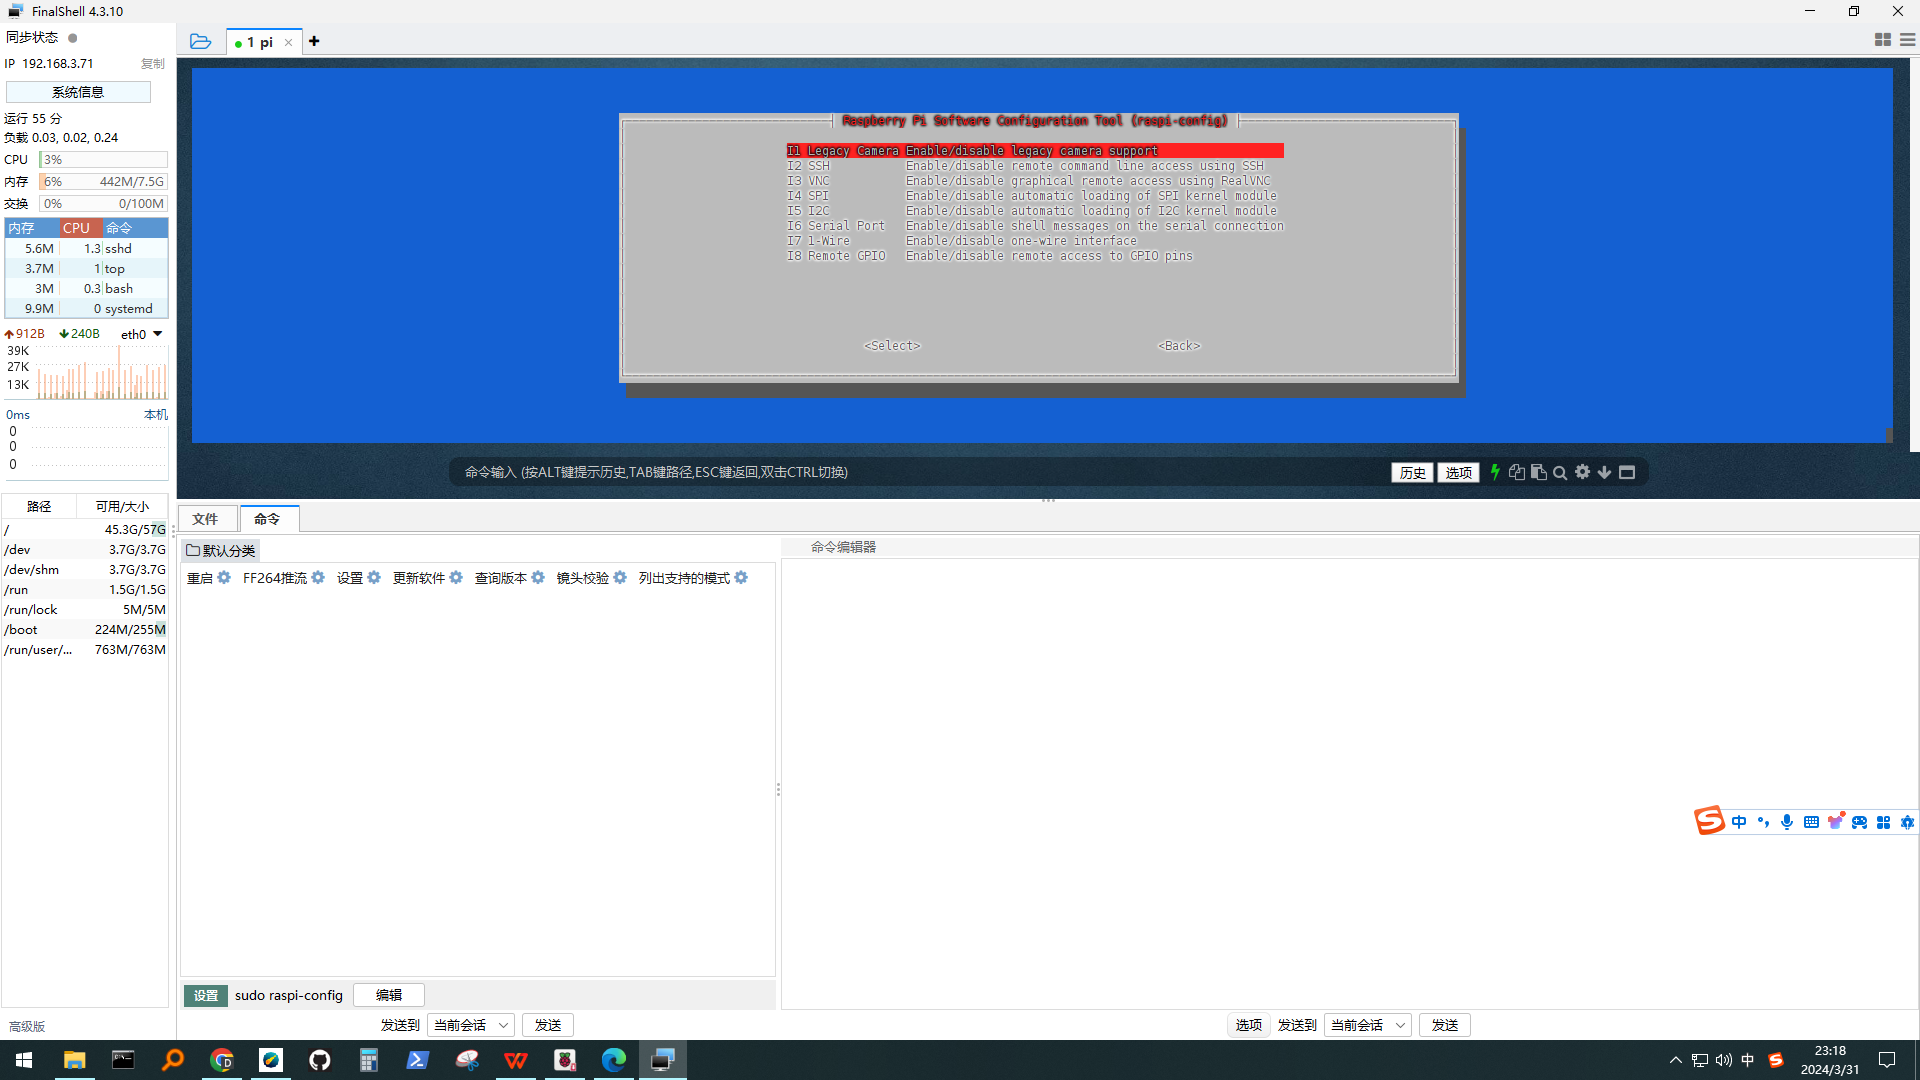
1、sudo raspi-config
进入选项3,启用Camera 和 I2C,然后重启。
图片1
2、修改 hosts文件,提高访问github速度
sudo nano /etc/hosts在最后添加这两行
151.101.72.249 github.global.ssl.fastly.net
192.30.255.112 github.com3、更换国内源 aarch64
1)首先,用如下命令,查看 Raspberry Pi OS (64-bit) 对应的 Debian 版本:
cat /etc/debian_version 11.3
可见这里对应的版本为11。
2)然后通过uname -m确定系统的架构:
uname -a
Linux raspberrypi 5.10.92-v8+ #1514 SMP PREEMPT Mon Jan 17 17:39:38 GMT 2022 aarch64 GNU/Linux
可见为aarch64。而对于aarch64 用户,修改软件源步骤如下:
(1)编辑 sudo nano /etc/apt/sources.list文件,用以下内容取代:默认注释了源码镜像以提高 apt update 速度,如有需要可自行取消注释
默认注释了源码镜像以提高 apt update 速度,如有需要可自行取消注释
deb https://mirrors.tuna.tsinghua.edu.cn/debian/ bullseye main contrib non-free
deb https://mirrors.tuna.tsinghua.edu.cn/debian/ bullseye-updates main contrib non-free
deb https://mirrors.tuna.tsinghua.edu.cn/debian/ bullseye-backports main contrib non-free
deb https://mirrors.tuna.tsinghua.edu.cn/debian-security bullseye-security main contrib non-free(2)编辑sudo nano /etc/apt/sources.list.d/raspi.list文件,删除原文件所有内容,用以下内容取代:
deb http://mirrors.tuna.tsinghua.edu.cn/raspberrypi/ bullseye main
3) 完成以上步骤后,更新软件源即可:
sudo apt update -
三、下载镜头驱动包
详见V4L2 mode for Raspberry Pi/zh
https://wiki.veye.cc/index.php/V4L2_mode_for_Raspberry_Pi/zh1、下载
wget https://github.com/veyeimaging/raspberrypi_v4l2/releases/latest/download/raspberrypi_v4l2.tgz2、 安装驱动
tar -xzvf raspberrypi_v4l2.tgz
cd raspberrypi_v4l2/release/
chmod +x *3、其他树莓派
最终执行指令为
sudo ./install_driver.sh veyecam2m
备注:veyecam2m是新版本驱动,可以替代veye327,支持VEYE系列200w分辨率的所有模组。请使用veyecam2m,而不是veye327,以后我们会废弃掉veye327.ko。
重启树莓派4、摄像头状态验证
以veye327为例:
dmesg | grep veye
可以看到:
veye327 camera probed
并且/dev/video0 节点存在,证明摄像头状态正常。
如果采用veyecam2m驱动,会提示sensor型号及版型,如:
camera id is veyecam2m
sensor is IMX327
board type is ONE board
veyecam2m camera probed5.1 列出支持的模式
v4l2-ctl --list-formats-ext. -
推荐使用:Gstreamer方案
1、安装gstreamer
sudo apt-get install gstreamer1.0-toolssudo apt-get install libx264-dev libjpeg-dev
sudo apt-get install libgstreamer1.0-dev libgstreamer-plugins-base1.0-dev libgstreamer-plugins-bad1.0-dev gstreamer1.0-plugins-ugly gstreamer1.0-tools gstreamer1.0-gl gstreamer1.0-gtk3
sudo apt-get install gstreamer1.0-plugins-bad
2、打开MeteorMaster,同时打开RealVNC Viewer,在RealVNC Viewer输入推流:
gst-launch-1.0 -v v4l2src device=/dev/video0 num-buffers=-1 ! "video/x-raw,format=(string)UYVY, width=(int)1920, height=(int)1080,framerate=(fraction)30/1" ! clockoverlay time-format="%D %H:%M:%S" font-desc="Sans 10" ! v4l2h264enc extra-controls="controls, h264_profile=4, video_bitrate=8000000" ! 'video/x-h264, profile=high, level=(string)4' ! h264parse ! flvmux ! rtmpsink location=rtmp://192.168.31.91:5000/live/MeteorMaster
四、FFMPEG 推流
1、查看ffmpeg -h
2、在另外一台WIN10 电脑微软商城下载meteor master ai 流星监控软件(此软件内置FFMPEG服务器)
3、打开meteor master ai 流星监控软件
向meteor master ai 推流 连接画面
服务器地址 rtmp://127.0.0.1:5000/live/
推流码MeteorMaster
rtmp地址为rtmp://127.0.0.1:5000/live/MeteorMaster
查看WIN10 IP地址,需要组成RTMP推流地址。比如rtmp://192.168.3.10:5000/live/MeteorMaster4、树莓派输入推流
(1)查询FFMPEG 支持解码
ffmpeg -decoders
(2)我选择h264_v4l2m2m
推流
ffmpeg -f v4l2 -framerate 30 -video_size 1920x1080 -i /dev/video0 -vcodec h264_v4l2m2m -preset veryfast -b:v 8000k -f flv rtmp://192.168.3.76:5004/live/MeteorMaster显示以下信息,表明已经推流到meteor master ai 流星监控软件
Metadata:
encoder : Lavf58.45.100
Stream #0:0: Video: h264 (libx264) ([7][0][0][0] / 0x0007), yuv422p, 1920x1080, q=-1--1, 4000 kb/s, 1000k fps, 1k tbn, 1000k tbc
Metadata:
encoder : Lavc58.91.100 libx264
Side data:
cpb: bitrate max/min/avg: 0/0/4000000 buffer size: 0 vbv_delay: N/A
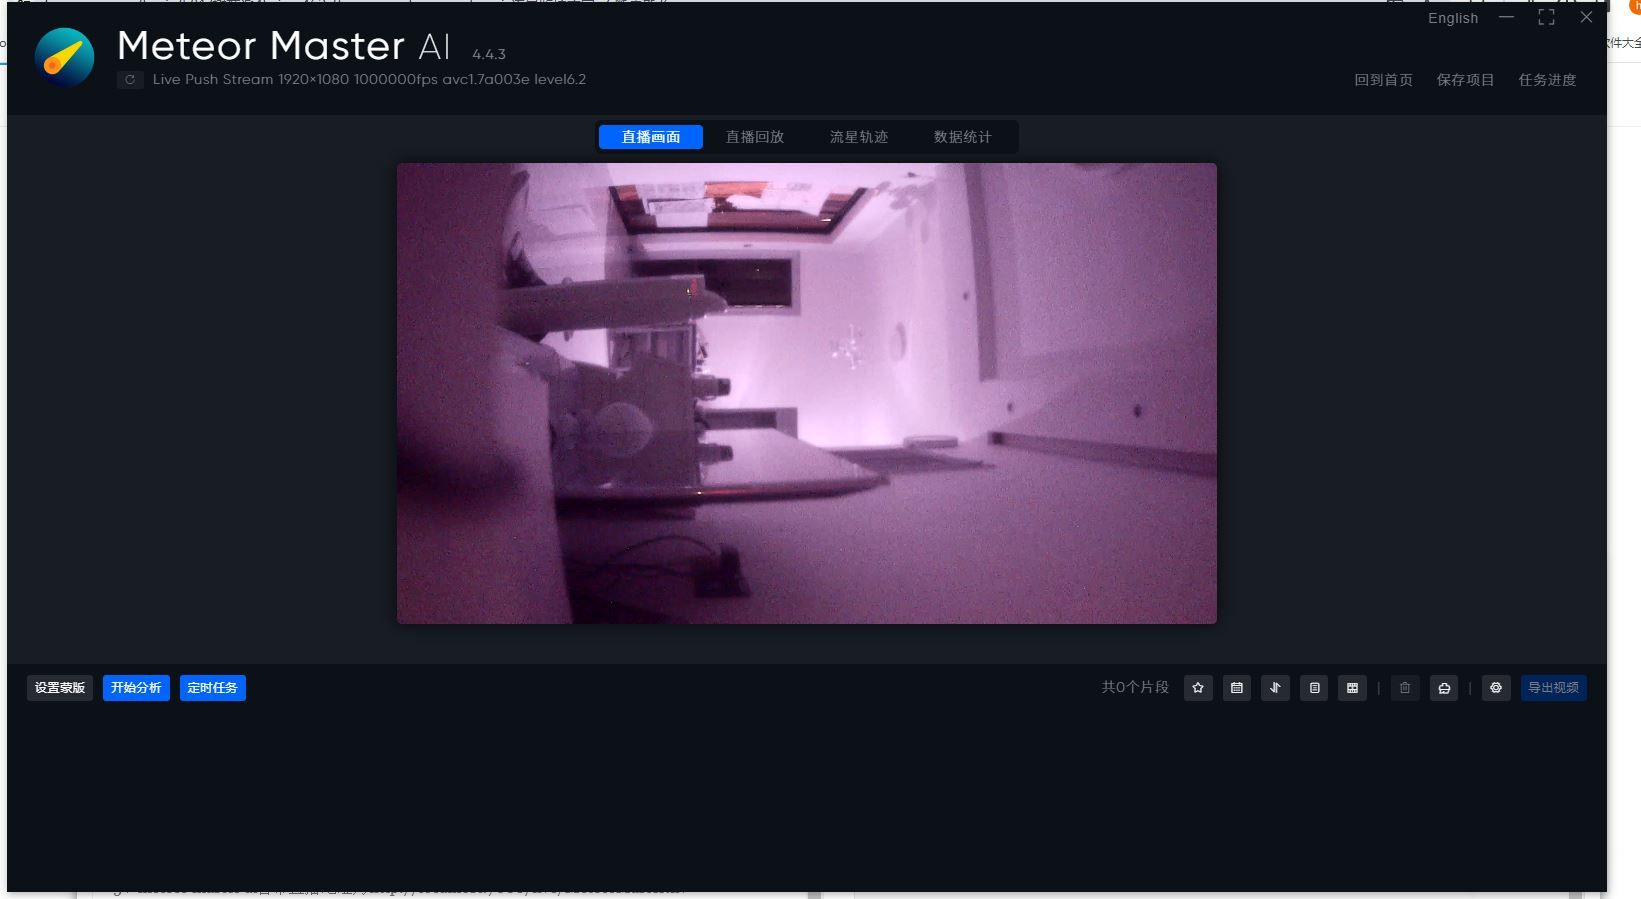
frame= 87 fps=8.1 q=32.0 size= 2764kB time=00:00:04.33 bitrate=5224.4kbits/s speed=05、meteor master ai自带直播地址为http://localhost:7000/live/MeteorMaster.flv
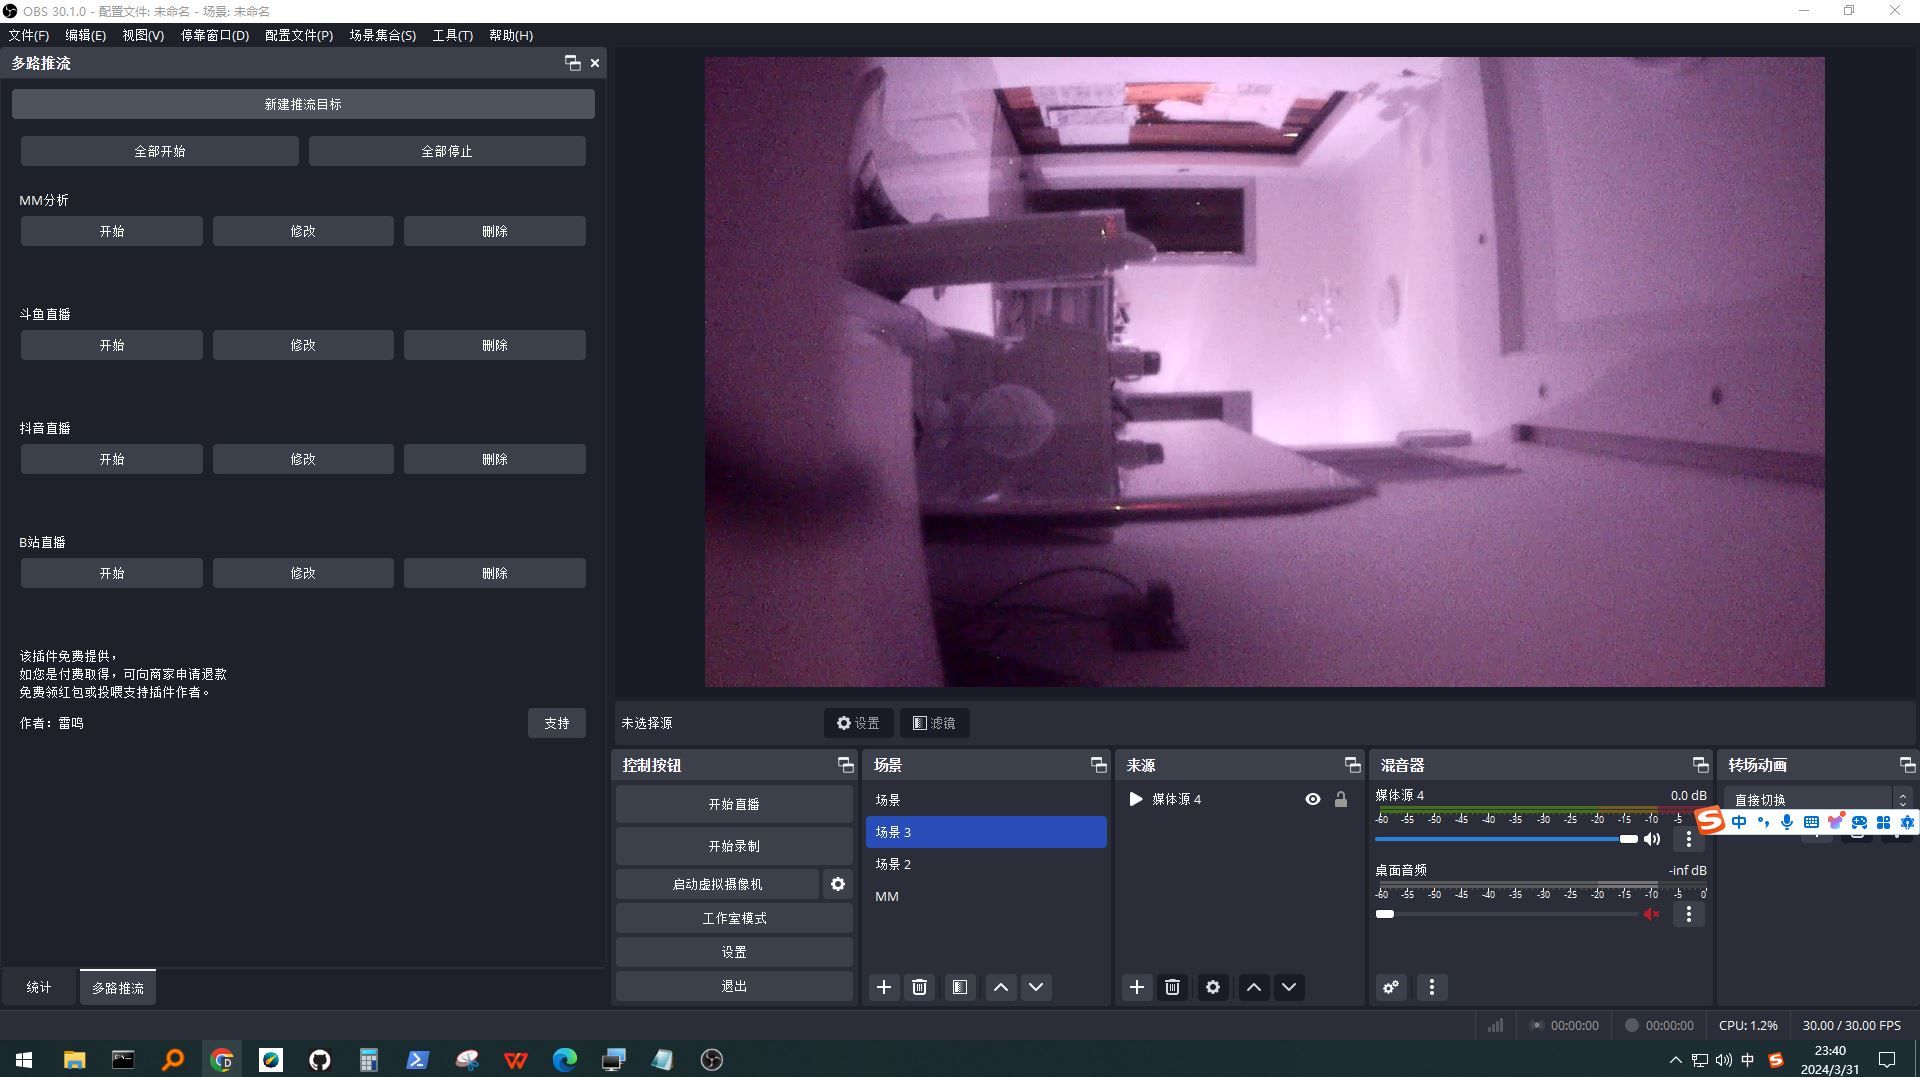
把这个地址输入到OBS或VSPlayer软件可以直接打开。可以使用meteor master ai流星监控软件设置自动导出流星视频添加水印,这样就不用在FFMPEG添加水印语句。
OBS直播用
-
@fuhesong 太棒了~
不过我看你的图像,颜色偏粉,是不是镜头没有红外滤光片? -
@veye_xumm 监控流星,把红外截止滤镜拿掉了
-
五、调整镜头参数
1、64位系统要重新编译下,地址在raspberrypi_v4l2/i2c_cmd/source/,执行下make.sh文件cd raspberrypi_v4l2/i2c_cmd/source/
chmod +x *
sudo ./make.sh返回目录raspberrypi_v4l2/i2c_cmd/
cd ..
执行
./veye_mipi_i2c.sh显示
options:
-r read
-w write
-f [function name] function name
-p1 [param1] param1 of each function
-p2 [param1] param2 of each function
-b [i2c bus num] i2c bus number
-d [i2c addr] i2c addr if not default 0x3b
support functions: devid,hdver,sensorid,wdrmode,videoformat,mirrormode,denoise,agc,lowlight,daynightmode,ircutdir,irtrigger mshutter,curshutter
cameramode, nodf, capture, csienable,saturation,wdrbtargetbr,wdrtargetbr, brightness ,contrast , sharppen,wdrsharppen aespeed,lsc,boardmodel,yuvseq,i2cauxenable,i2cwen,awbgain,wbmode,mwbgain,antiflicker,awb_boffset,blcstrength,blcpos,paramsave
new_expmode,new_mshutter,new_mgain2、参考地址
VEYE-MIPI-X I2C.sh用户手册
https://wiki.veye.cc/index.php/VEYE-MIPI-290/327_i2c/zh3、下载VNC远程打开树莓派
下载地址:https://www.realvnc.com/en/
由于树莓派没有连接显示器,VNC远程连接会提示错误。需要改变树莓派VNC的分辨率
sudo nano /boot/config.txt
语句位置在28、29行。将hdmi_group、hdmi_mode前的#去掉。
新添语句:hdmi_ignore_edid=0xa500080uncomment to force a specific HDMI mode (this will force VGA)
hdmi_group=2
hdmi_mode=82
hdmi_ignore_edid=0xa500080要想关闭树莓派的电源指示灯和状态指示灯
dtparam=act_led_trigger=none
dtparam=pwr_led_trigger=none最后别忘记ctrl+s保存文件,命令终端输入reboot等待重新载入桌面即可。
参考地址https://blog.csdn.net/ownmonent/article/details/126319919?spm=1001.2014.3001.5506使用VNC连接树莓派,打开VLC, 连接镜头,用于调试参数。
参考地址7.1 使用VLC预览图像
https://wiki.veye.cc/index.php/V4L2_mode_for_Raspberry_Pi/zh图片一

4、重要参数 调整,监控流星与其他不一样。
5.4 wdrmode
./veye_mipi_i2c.sh -r -f wdrmode
./veye_mipi_i2c.sh -w -f wdrmode -p1 [value]
value description
0x00 Back Light Mode OFF
0x01 Back Light Mode ON, LOW
0x02 Back Light Mode ON, HIGH
0x03 DOL WDR Enable
背光模式
0x00背光模式关闭
0x01背光模式开启,低
0x02背光模式开启,高
0x03 DOL WDR启用
输入:
./veye_mipi_i2c.sh -w -f wdrmode -p1 0x00
查看结果:
./veye_mipi_i2c.sh -r -f wdrmode5.5 videoformat
./veye_mipi_i2c.sh -r -f videoformat
./veye_mipi_i2c.sh -w -f videoformat -p1 [value]
WARNING:THIS FUNCTION MUST BE CALLED BEFORE ANY video applications
value description frame rate
PAL PAL(50Hz) 25fps
NTSC NTSC(60Hz) 30fps
视频格式
PAL PAL(50Hz)25fps
NTSC NTSC(60Hz)每秒30帧输入:
./veye_mipi_i2c.sh -w -f videoformat -p1 NTSC
查看:
./veye_mipi_i2c.sh -r -f videoformat5.6 mirrormode
./veye_mipi_i2c.sh -r -f mirrormode
./veye_mipi_i2c.sh -w -f mirrormode -p1 [value]
value description
0x00 Normal
0x01 Mirror
0x02 V-Flip
0x03 Mirror And V-Flip(180 Degree Rotate)
反光镜模式
0x00正常
0x01镜像
0x02 V型翻转
0x03镜像和V型翻转(180度旋转)./veye_mipi_i2c.sh -w -f mirrormode -p1 0x00
查看:
./veye_mipi_i2c.sh -r -f mirrormode5.7 denoise
./veye_mipi_i2c.sh -r -f denoise
./veye_mipi_i2c.sh -w -f denoise -p1 [value]
value description
0x00 NR 2D Mode = OFF; NR 3D Mode = OFF
0x01 NR 2D Mode = OFF; NR 3D Mode = LOW
0x02 NR 2D Mode = OFF; NR 3D Mode = MIDDLE
0x03 NR 2D Mode = OFF; NR 3D Mode = HIGH
0x04 NR 2D Mode = LOW; NR 3D Mode = OFF
0x05 NR 2D Mode = LOW; NR 3D Mode = LOW
0x06 NR 2D Mode = LOW; NR 3D Mode = MIDDLE
0x07 NR 2D Mode = LOW; NR 3D Mode = HIGH
0x08 NR 2D Mode =MIDDLE; NR 3D Mode = OFF
0x09 NR 2D Mode =MIDDLE; NR 3D Mode = LOW
0x0A NR 2D Mode = MIDDLE; NR 3D Mode = MIDDLE
0x0B NR 2D Mode = MIDDLE; NR 3D Mode = HIGH
0x0C NR 2D Mode =HIGH; NR 3D Mode = OFF
0x0D NR 2D Mode =HIGH; NR 3D Mode = LOW
0x0E NR 2D Mode = HIGH; NR 3D Mode = MIDDLE
0x0F NR 2D Mode = HIGH; NR 3D Mode = HIGH去噪
0x00 NR 2D模式=关闭;NR 3D模式=关闭
0x01 NR 2D模式=关闭;NR 3D模式=低
0x02 NR 2D模式=关闭;NR 3D模式=中间
0x03 NR 2D模式=关闭;NR 3D模式=高
0x04 NR 2D模式=低;NR 3D模式=关闭
0x05 NR 2D模式=低;NR 3D模式=低
0x06 NR 2D模式=低;NR 3D模式=中间
0x07 NR 2D模式=低;NR 3D模式=高
0x08 NR 2D模式=中间;NR 3D模式=关闭
0x09 NR 2D模式=中间;NR 3D模式=低
0x0A NR 2D模式=中间;NR 3D模式=中间
0x0B NR 2D模式=中间;NR 3D模式=高
0x0C NR 2D模式=高;NR 3D模式=关闭
0x0D NR 2D模式=高;NR 3D模式=低
0x0E NR 2D模式=高;NR 3D模式=中间
0x0F NR 2D模式=高;NR 3D模式=高根据自己需求调整,不要降噪太多
输入:
./veye_mipi_i2c.sh -w -f denoise -p1 0x05
查看:
./veye_mipi_i2c.sh -r -f denoise5.8 agc
./veye_mipi_i2c.sh -r -f agc
./veye_mipi_i2c.sh -w -f agc -p1 [value]
含义为增益上限,默认为0xC。value description
0x00~0x0F AGC intensity
增益
含义为增益上限,默认为0xC
价值描述
0x00~0x0F AGC强度
夜晚时候可以适当打开增益,建议50或50%左右,不建议0或100
输入:
./veye_mipi_i2c.sh -w -f agc -p1 0x0a
查看:
./veye_mipi_i2c.sh -r -f agc5.9 lowlight
./veye_mipi_i2c.sh -r -f lowlight
./veye_mipi_i2c.sh -w -f lowlight -p1 [value]
低照度情况下的降帧(慢快门)设置。在低照度情况下,摄像机模组可以通过配置此参数,延长曝光时间,降低帧率,达到更好的低照度效果。注意,在运动场景下不适合使用。
value 最小帧率
0x01 1/2*(FRAME RATE)
0x03 1/4*(FRAME RATE)
0x05 1/6*(FRAME RATE)
0x07 1/8*(FRAME RATE)
0x09 1/10*(FRAME RATE)
0x0B 1/15*(FRAME RATE)
0x0D 1/20*(FRAME RATE)
0x0F 1/25*(FRAME RATE)
0x11 1/30*(FRAME RATE)
0x00 Fixed frame rate (25/30)输出:
./veye_mipi_i2c.sh -w -f lowlight -p1 0x0F
输入:
./veye_mipi_i2c.sh -r -f lowlight5.10 daynightmode
./veye_mipi_i2c.sh -r -f daynightmode
./veye_mipi_i2c.sh -w -f daynightmode -p1 [value]
value description
0xFF Color Mode
0xFE Black&White Mode
0xFC Trigger Mode昼夜模式描述
0xFF彩色模式
0xFE黑白模式
0xFC触发器模式
输入:
./veye_mipi_i2c.sh -w -f daynightmode -p1 0xFF
查看:
./veye_mipi_i2c.sh -r -f daynightmode0x0A5.13 mshutter
自动曝光,手动曝光模式选择和配置。./veye_mipi_i2c.sh -r -f mshutter
./veye_mipi_i2c.sh -w -f mshutter -p1 [value]
value值为曝光时间(单位:s)
value 大于等于0x4B则进入低帧率模式
value description
NTSC(PAL)
0x40 auto mode
0x41 1/30 (25)
0x42 1/60(50)
0x43 1/120(100)
0x44 1/240(200)
0x45 1/480(400)
0x46 1/1000
0x47 1/2000
0x48 1/5000
0x49 1/10000
0x4A 1/50000
0x4B 1/30 (25) *2
0x4C 1/30 (25) *4
0x4D 1/30 (25) *6
0x4E 1/30 (25) *8
0x4F 1/30 (25) *10
0x50 1/30 (25) *15
0x51 1/30 (25) *20
0x52 1/30 (25) *25
0x53 1/30 (25) *30输入:
./veye_mipi_i2c.sh -w -f mshutter -p1 0x41
查看:
./veye_mipi_i2c.sh -r -f mshutter5.15 nodf
Requirements:hdver >= 0x3, effective in Stream modeNumber of dropped frames
It is a method of framerate control, output one frame,discard nodf frames,output next frame, and so on.
actual framerate = original framerate /(1+nodf)
For example,if the original framerate is 30fps, set nodf to 2, then actual framerate is 10fps.
./veye_mipi_i2c.sh -r -f nodf
./veye_mipi_i2c.sh -w -f nodf -p1 [value]
ntof range is [0-0xFF], default 0.
无DF
要求:hdver>=0x3,在流模式下有效
丢弃的帧数
它是一种帧速率控制方法,输出一帧、丢弃nodf帧、输出下一帧等等。
实际帧速率=原始帧速率/(1+nodf)
例如,如果原始帧速率为30fps,请将nodf设置为2,则实际帧速率是10fps。
./veye_mipi_i2c.sh-r-f nodf
./veye_mipi_i2c.sh-w-f nodf-p1[value]
ntof范围为[0-xFF],默认为0。执行:
./veye_mipi_i2c.sh -w -f nodf -p1 0x00
查看
./veye_mipi_i2c.sh -r -f nodf5.18 brightness
./veye_mipi_i2c.sh -r -f brightness
./veye_mipi_i2c.sh -w -f brightness -p1 0x32
AE的目标亮度,范围[0,0x64]执行:
./veye_mipi_i2c.sh -w -f brightness -p1 0x32
查看:
./veye_mipi_i2c.sh -r -f brightness5.19 aespeed
./veye_mipi_i2c.sh -r -f aespeed
./veye_mipi_i2c.sh -w -f aespeed -p1 0x32 -p2 0x32
AE 调节速度p1为agc速度,p2为shutter速度,由慢到快[0,0x64]
执行
./veye_mipi_i2c.sh -w -f aespeed -p1 0x32 -p2 0x32
查看
./veye_mipi_i2c.sh -r -f aespeed5.20 contrast
./veye_mipi_i2c.sh -r -f contrast
./veye_mipi_i2c.sh -w -f contrast -p1 0x32
图像对比度,范围[0,0xFF],默认为0x80执行
./veye_mipi_i2c.sh -w -f contrast -p1 0x32
查看
./veye_mipi_i2c.sh -r -f contrast5.21 saturation
./veye_mipi_i2c.sh -r -f saturation
./veye_mipi_i2c.sh -w -f saturation -p1 0x32
饱和度,范围: [0,0x64]
执行
./veye_mipi_i2c.sh -w -f saturation -p1 0x32
查看
./veye_mipi_i2c.sh -r -f saturation5.22 sharppen
./veye_mipi_i2c.sh -r -f sharppen
./veye_mipi_i2c.sh -w -f sharppen -p1 [val1] -p2 [value]
param1 value description
0x0 sharppen disable
0x1 sharppen enable
default: 0x1
param2: sharppen strength, range [0x0-0xA]param1值描述
0x0锐度禁用
0x1锐度启用
默认值:0x1
param2:锐笔强度,范围[0x0-0xA]执行
./veye_mipi_i2c.sh -w -f sharppen -p1 0x1 -p2 0x03
查看
./veye_mipi_i2c.sh -r -f sharppen5.24 wdrtargetbr
./veye_mipi_i2c.sh -r -f wdrtargetbr
./veye_mipi_i2c.sh -w -f wdrtargetbr -p1 0x80
宽动态模式下的整体亮度目标值。
WDR模式生效,[0-0xFF]默认值0x80,WDR模式下,值越大,亮度越高。执行
查看
./veye_mipi_i2c.sh -r -f wdrtargetbr6.1 paramsave
./veye_mipi_i2c.sh -w -f paramsave保存isp相关参数到flash中。
备注:如果懒直接用这个参数
晚上模式
./veye_mipi_i2c.sh -w -f wdrmode -p1 0x00
./veye_mipi_i2c.sh -w -f videoformat -p1 NTSC
./veye_mipi_i2c.sh -w -f mirrormode -p1 0x00
./veye_mipi_i2c.sh -w -f denoise -p1 0x02
./veye_mipi_i2c.sh -w -f agc -p1 0x41
./veye_mipi_i2c.sh -w -f lowlight -p1 0x00
./veye_mipi_i2c.sh -w -f ircutdir -p1 0xff
./veye_mipi_i2c.sh -w -f daynightmode -p1 0xff
./veye_mipi_i2c.sh -w -f mshutter -p1 0x41
./veye_mipi_i2c.sh -w -f cameramode -p1 0x0
./veye_mipi_i2c.sh -w -f nodf -p1 0x00
./veye_mipi_i2c.sh -w -f brightness -p1 0x32
./veye_mipi_i2c.sh -w -f aespeed -p1 0x32 -p2 0x32
./veye_mipi_i2c.sh -w -f contrast -p1 0x32
./veye_mipi_i2c.sh -w -f saturation -p1 0x32
./veye_mipi_i2c.sh -w -f sharppen -p1 0x1 -p2 0x5
./veye_mipi_i2c.sh -w -f wdrsharppen -p1 0x0 -p2 0x3
./veye_mipi_i2c.sh -w -f wdrbtargetbr -p1 0x00
./veye_mipi_i2c.sh -w -f wdrtargetbr -p1 0x0A
./veye_mipi_i2c.sh -w -f wbmode -p1 0x18
./veye_mipi_i2c.sh -w -f paramsave白天
./veye_mipi_i2c.sh -w -f wdrmode -p1 0x00
./veye_mipi_i2c.sh -w -f videoformat -p1 NTSC
./veye_mipi_i2c.sh -w -f mirrormode -p1 0x00
./veye_mipi_i2c.sh -w -f denoise -p1 0x00
./veye_mipi_i2c.sh -w -f agc -p1 0x00
./veye_mipi_i2c.sh -w -f lowlight -p1 0x00
./veye_mipi_i2c.sh -w -f ircutdir -p1 0xff
./veye_mipi_i2c.sh -w -f daynightmode -p1 0xff
./veye_mipi_i2c.sh -w -f mshutter -p1 0x40
./veye_mipi_i2c.sh -w -f cameramode -p1 0x0
./veye_mipi_i2c.sh -w -f nodf -p1 0x00
./veye_mipi_i2c.sh -w -f brightness -p1 0x32
./veye_mipi_i2c.sh -w -f aespeed -p1 0x32 -p2 0x32
./veye_mipi_i2c.sh -w -f contrast -p1 0x32
./veye_mipi_i2c.sh -w -f saturation -p1 0x32
./veye_mipi_i2c.sh -w -f sharppen -p1 0x1 -p2 0x5
./veye_mipi_i2c.sh -w -f wdrsharppen -p1 0x0 -p2 0x3
./veye_mipi_i2c.sh -w -f wdrbtargetbr -p1 0x00
./veye_mipi_i2c.sh -w -f wdrtargetbr -p1 0x0A
./veye_mipi_i2c.sh -w -f wbmode -p1 0x18
./veye_mipi_i2c.sh -w -f paramsave -
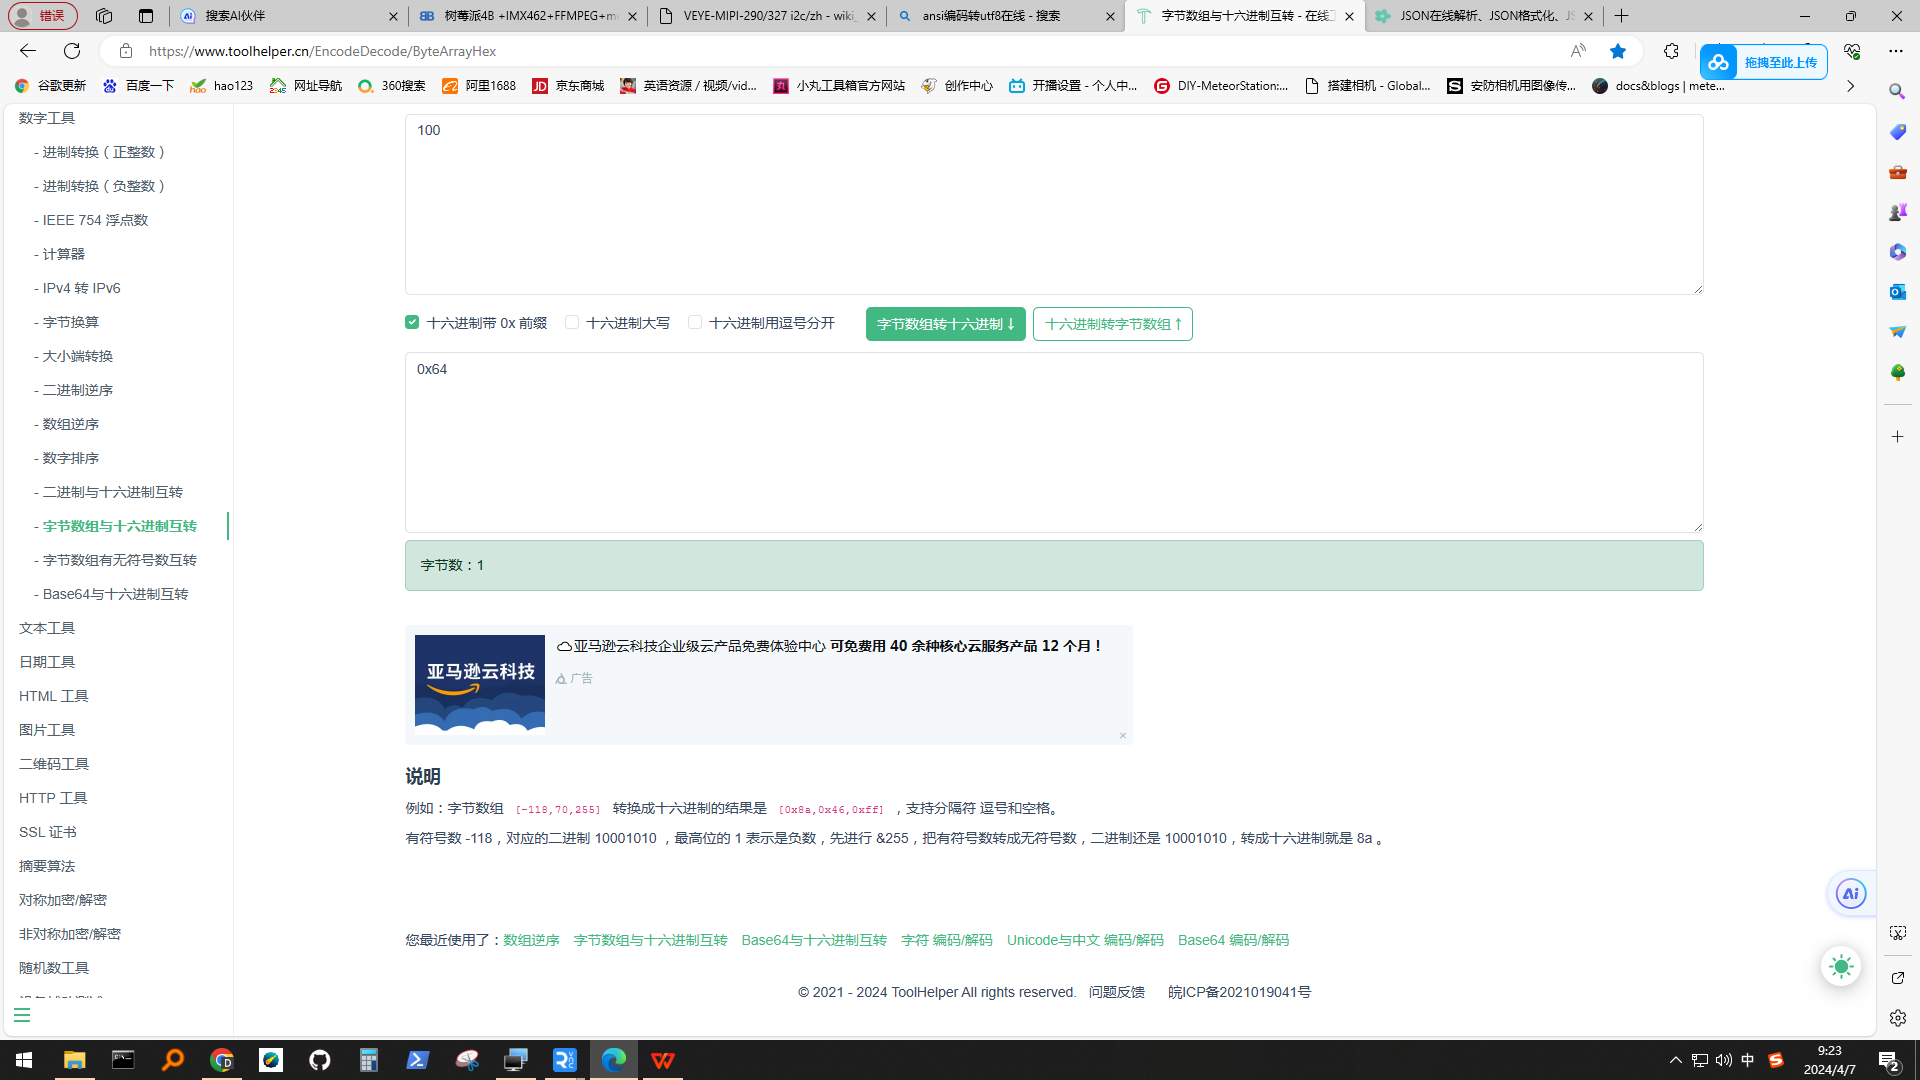
要想方便,直接访问这个网站,自动转化。字节数组与十六进制互转
https://www.toolhelper.cn/EncodeDecode/ByteArrayHex
ASCII对应码表-键值(完整版)
(十进制) (十六进制) 0 0x00 1 0x01 2 0x02 3 0x03 4 0x04 5 0x05 6 0x06 7 0x07 8 0x08 9 0x09 10 0x0A 11 0x0B 12 0x0C 13 0x0D 14 0x0E 15 0x0F 16 0x10 17 0x11 18 0x12 19 0x13 20 0x14 21 0x15 22 0x16 23 0x17 24 0x18 25 0x19 26 0x1A 27 0x1B 28 0x1C 29 0x1D 30 0x1E 31 0x1F 32 0x20 33 0x21 34 0x22 35 0x23 36 0x24 37 0x25 38 0x26 39 0x27 40 0x28 41 0x29 42 0x2A 43 0x2B 44 0x2C 45 0x2D 46 0x2E 47 0x2F 48 0x30 49 0x31 50 0x32 51 0x33 52 0x34 53 0x35 54 0x36 55 0x37 56 0x38 57 0x39 58 0x3A 59 0x3B 60 0x3C 61 0x3D 62 0x3E 63 0x3F 64 0x40 65 0x41 66 0x42 67 0x43 68 0x44 69 0x45 70 0x46 71 0x47 72 0x48 73 0x49 74 0x4A 75 0x4B 76 0x4C 77 0x4D 78 0x4E 79 0x4F 80 0x50 81 0x51 82 0x52 83 0x53 84 0x54 85 0x55 86 0x56 87 0x57 88 0x58 89 0x59 90 0x5A 91 0x5B 92 0x5C 93 0x5D 94 0x5E 95 0x5F 96 0x60 97 0x61 98 0x62 99 0x63 100 0x64 101 0x65 102 0x66 103 0x67 104 0x68 105 0x69 106 0x6A 107 0x6B 108 0x6C 109 0x6D 110 0x6E 111 0x6F 112 0x70 113 0x71 114 0x72 115 0x73 116 0x74 117 0x75 118 0x76 119 0x77 120 0x78 121 0x79 122 0x7A 123 0x7B 124 0x7C 125 0x7D 126 0x7E 127 0x7F -
@fuhesong 我看您做的这个东东挺有意思的,你有自己的blog之类的吗?
-
@veye_xumm 2024年某康监控拍到的流星合集(不断更新):链接:https://pan.baidu.com/s/118Q9dxjkVHFVwKr1SvnPcw?pwd=thrb
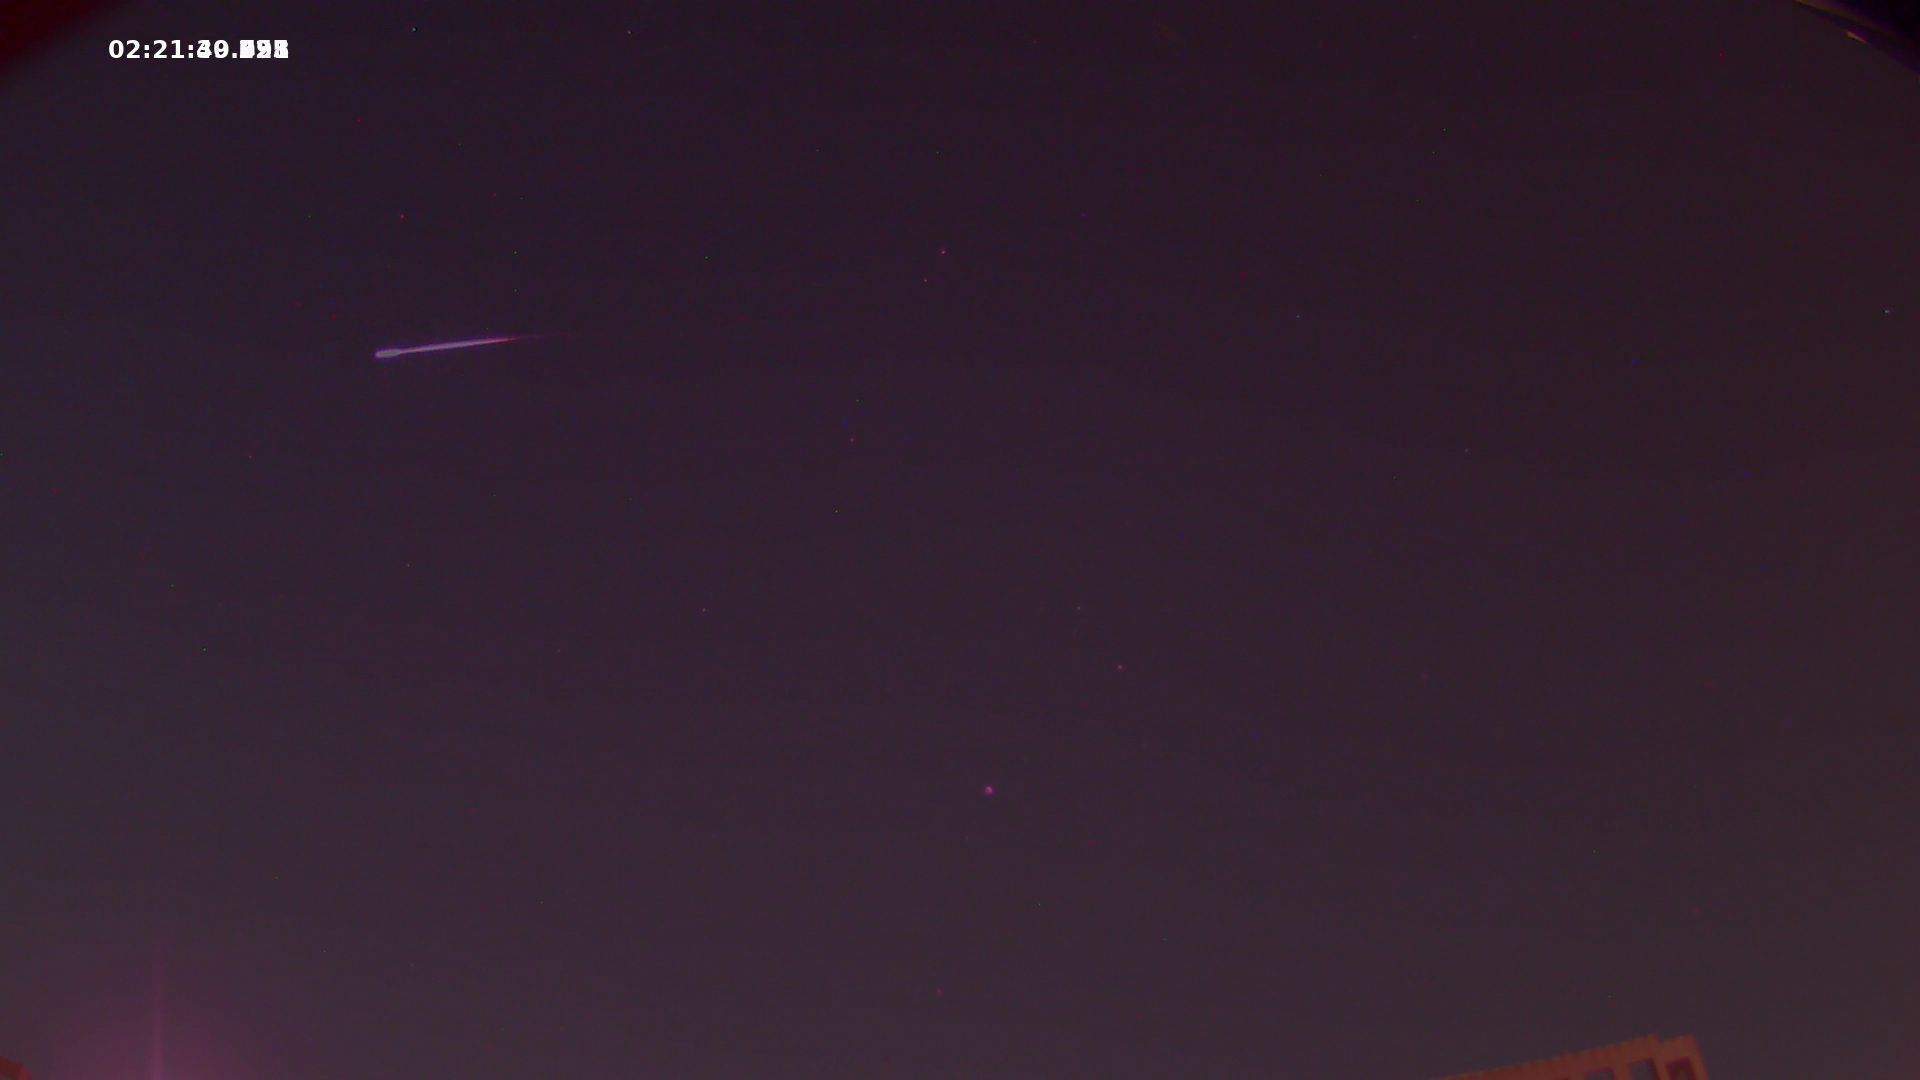
提取码:thrb七级光污染城市,F0.95 4MM 镜头拍到的开光流星,把监控扔到乡下2-4级光污染会好很多。这是使用meteor master ai导出来的图片
-
六、组装清单
自己DIY组装才有乐趣。
最终形态
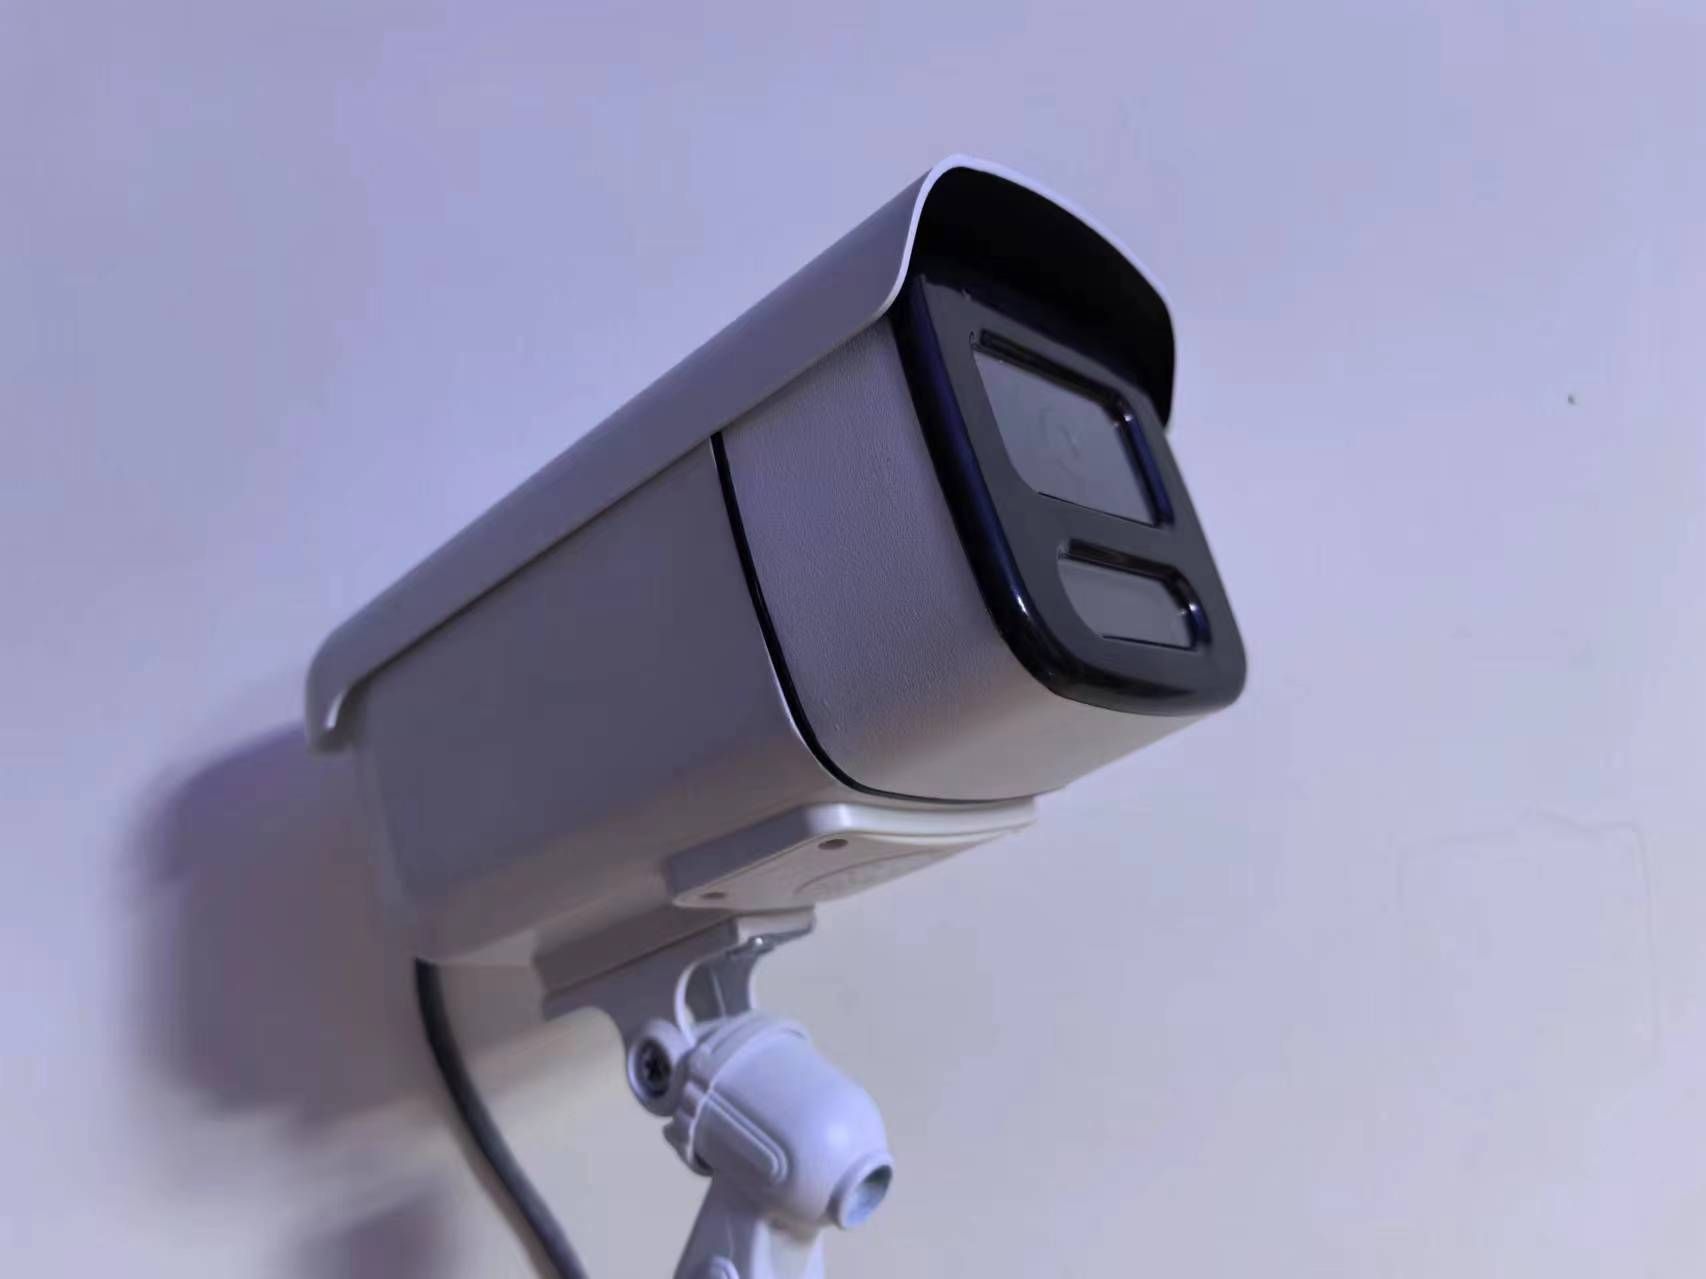
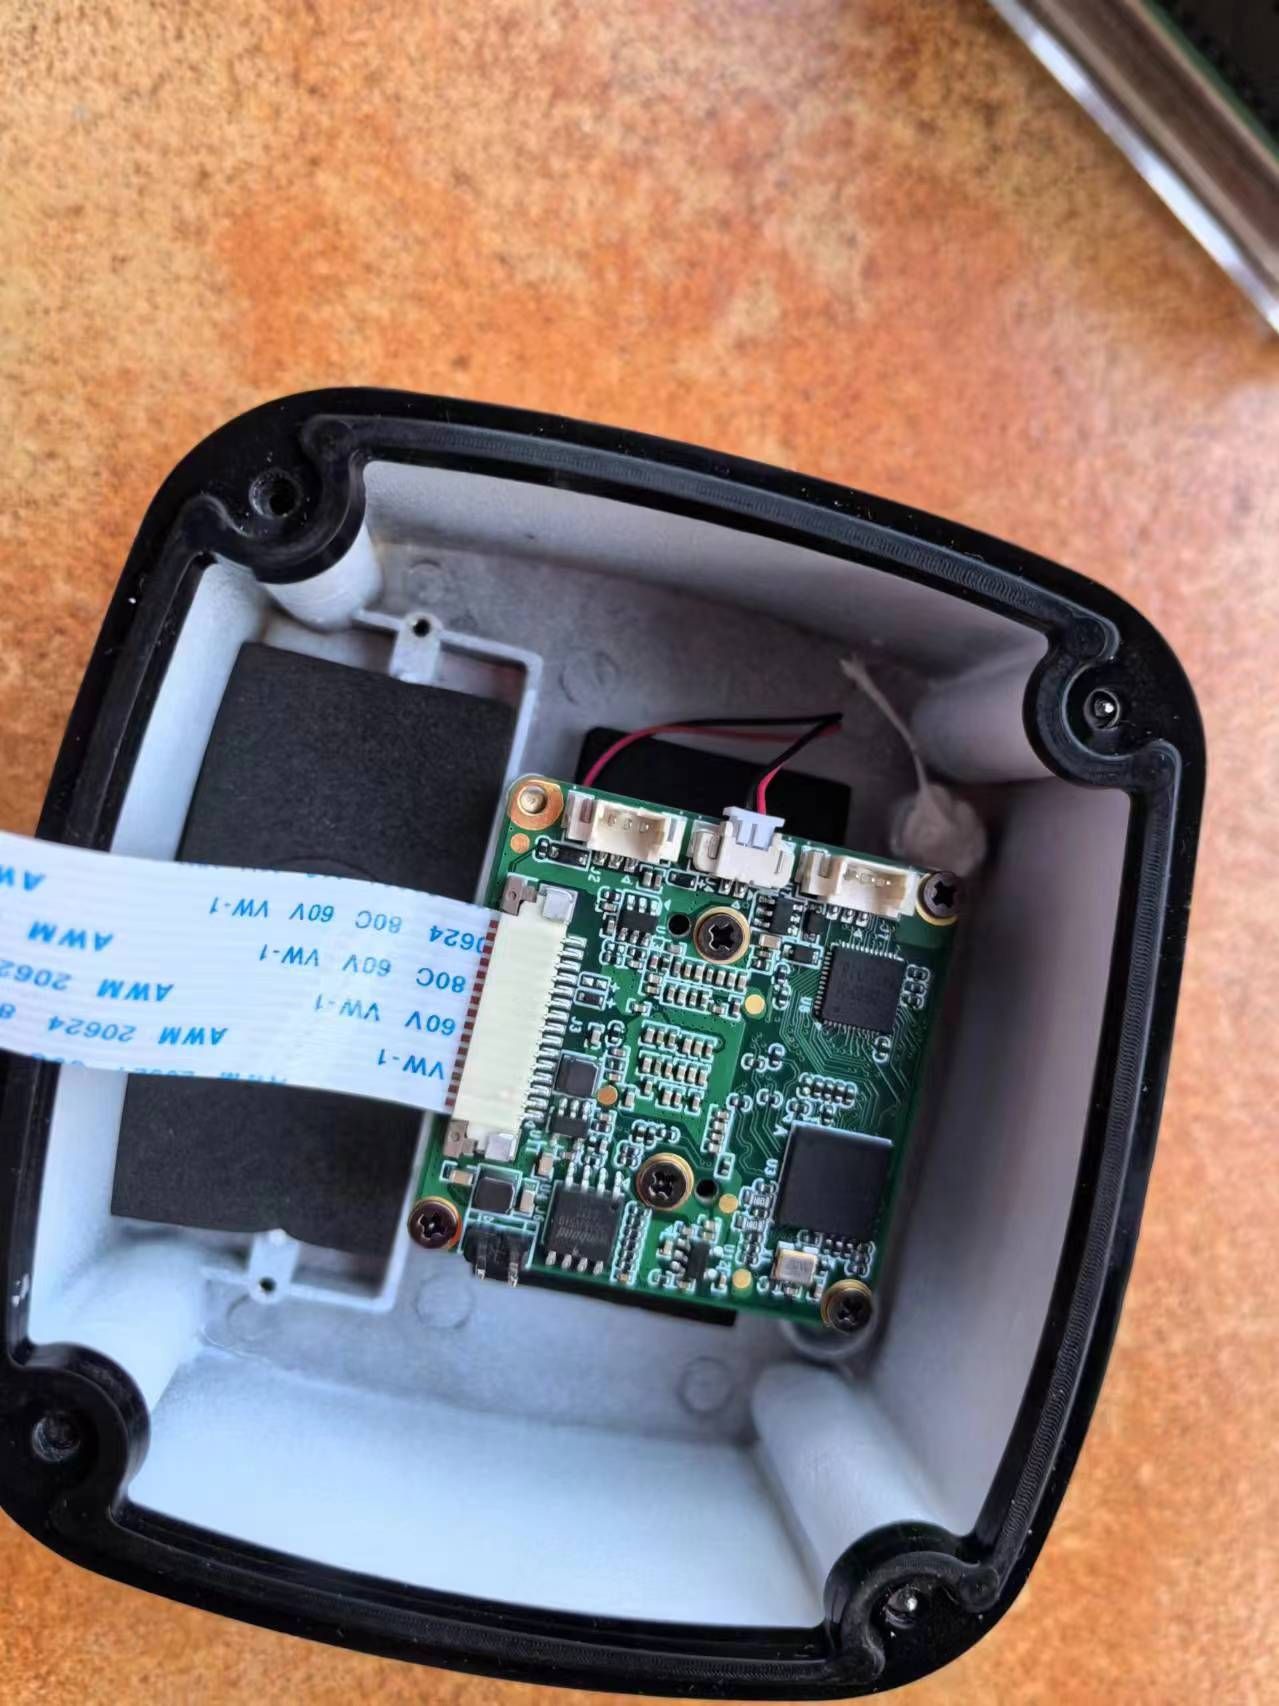
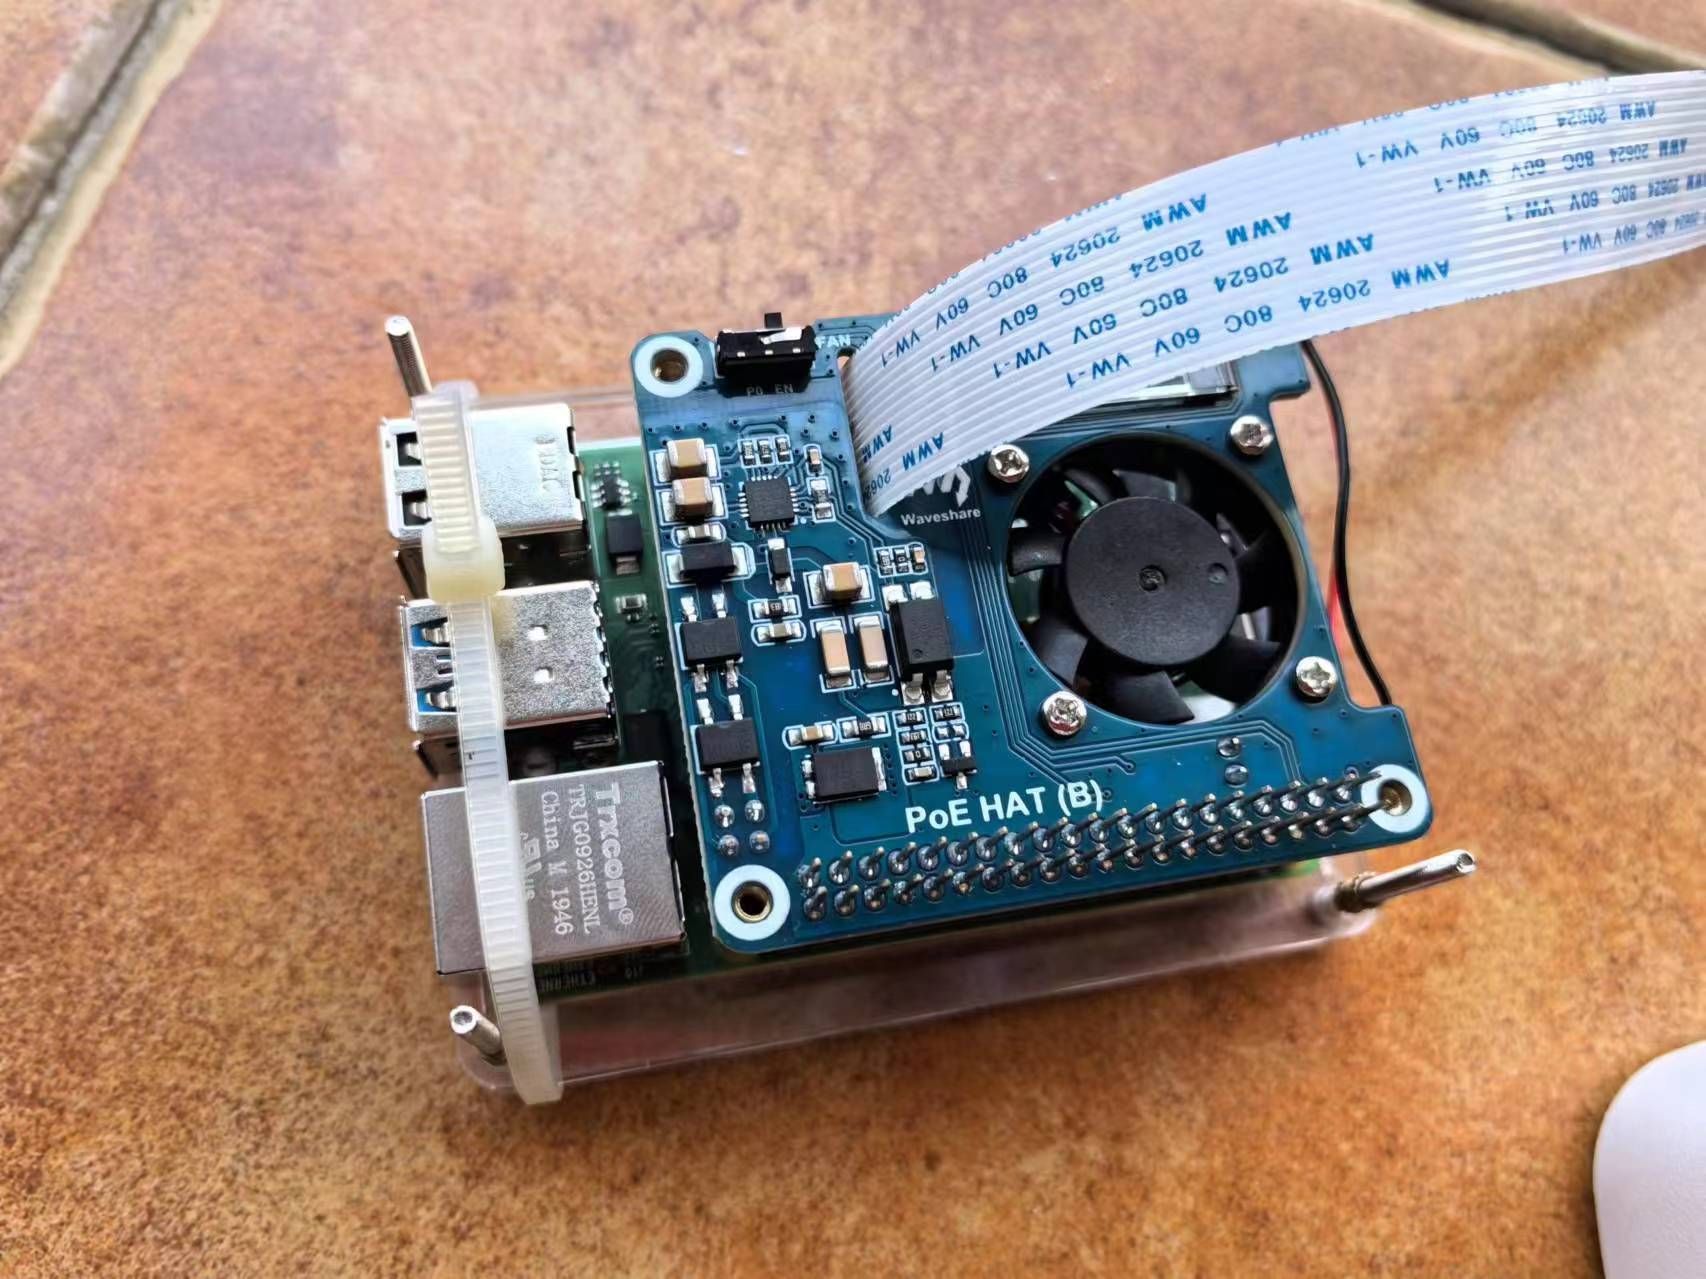
2、某鱼购买二手树莓派4G\8G
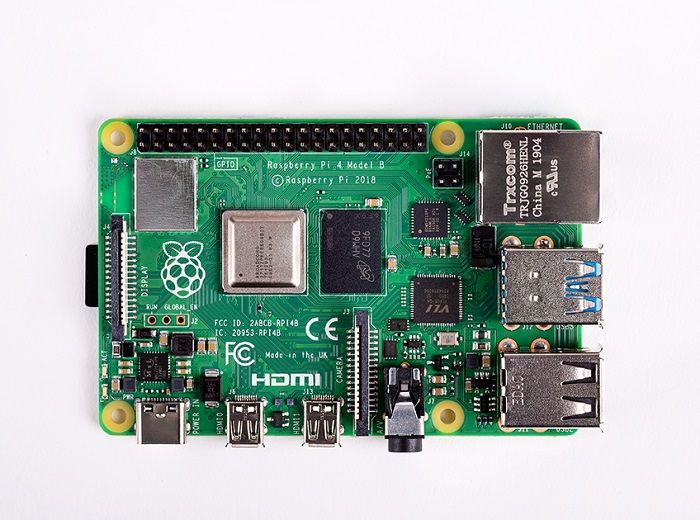
3、购买POE模块,可以不用额外花钱买电源线、风扇、HDMI线,买个64G SD卡就可以,其他都可以远程操作树莓派。

4、购买模组RAW-MIPI-IMX462M或者VEYE-MIPI-IMX462
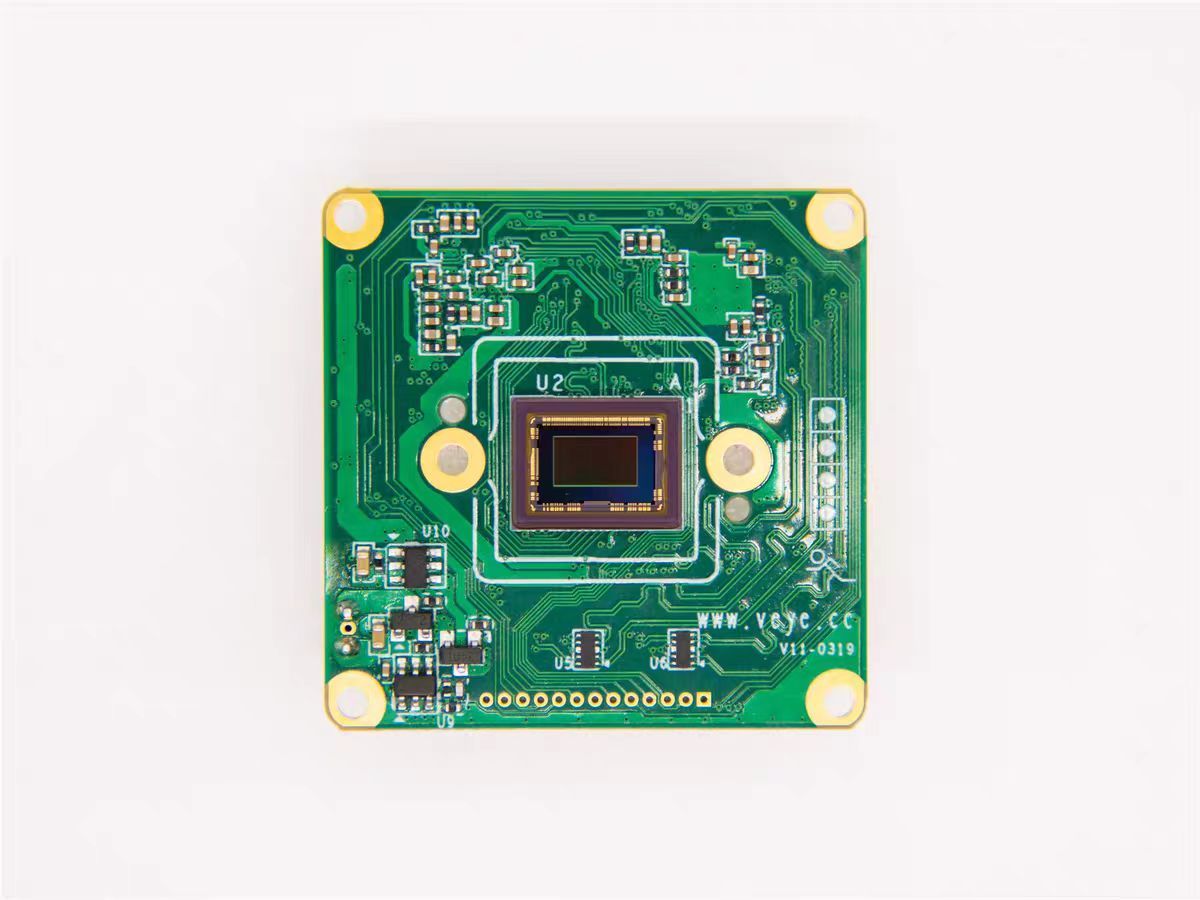
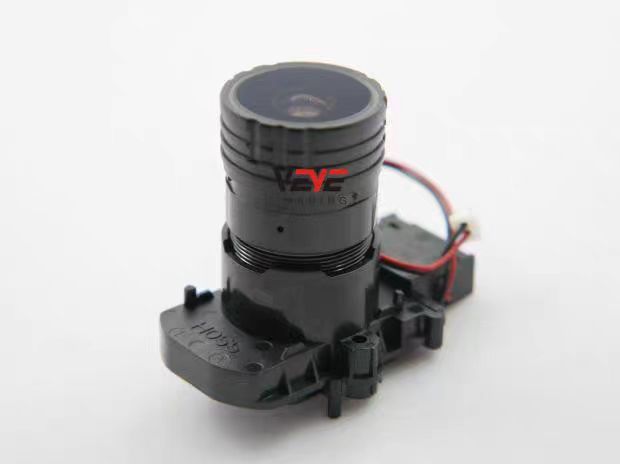
5、购买镜头
①镜头可以参考首选镜头是 4mm f/0.95 M16 镜头,提供 ~88x45° 视野。
②在城市天空中,或者如果您有很多障碍物(树木、建筑物等),我们建议使用以下 ~55x30° 视野的 6mm 镜头:6mm f/0.95 M16
③在光线污染严重的城市天空中,另一种选择是 8mm f/0.9 M16 镜头,它提供 ~40x20° 的视野:8毫米f/0.9 M16
④为了观察较暗的流星,可以使用以下 16mm f/1.0 镜头,该镜头仅提供有限的 20x10° 视野。
16mm f/1.0 CS 镜头
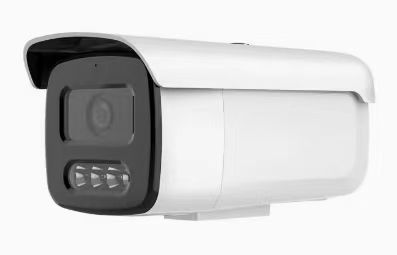
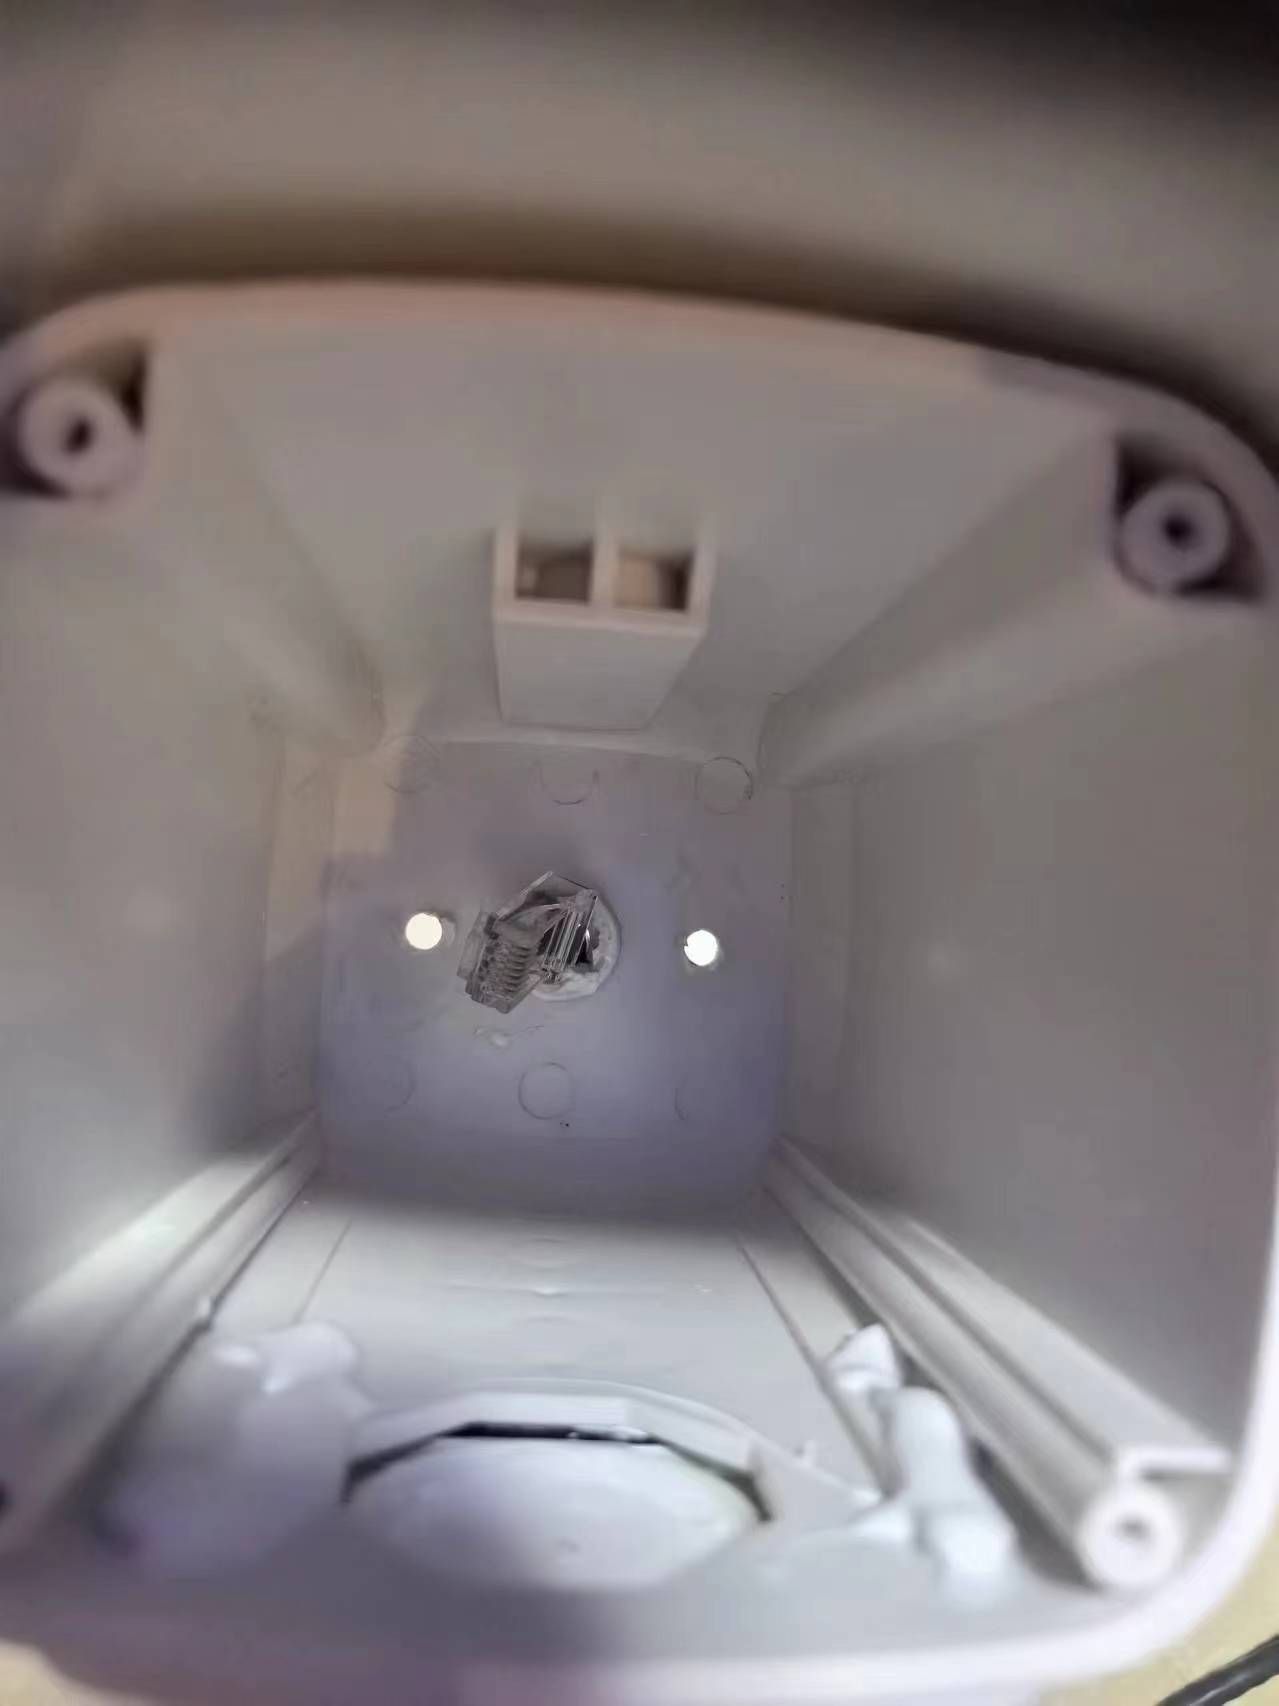
6、购买外壳,类似这种,刚好可以安装树莓派和镜头模组,建议后面自己打小孔散热,但要组装水是进不来。

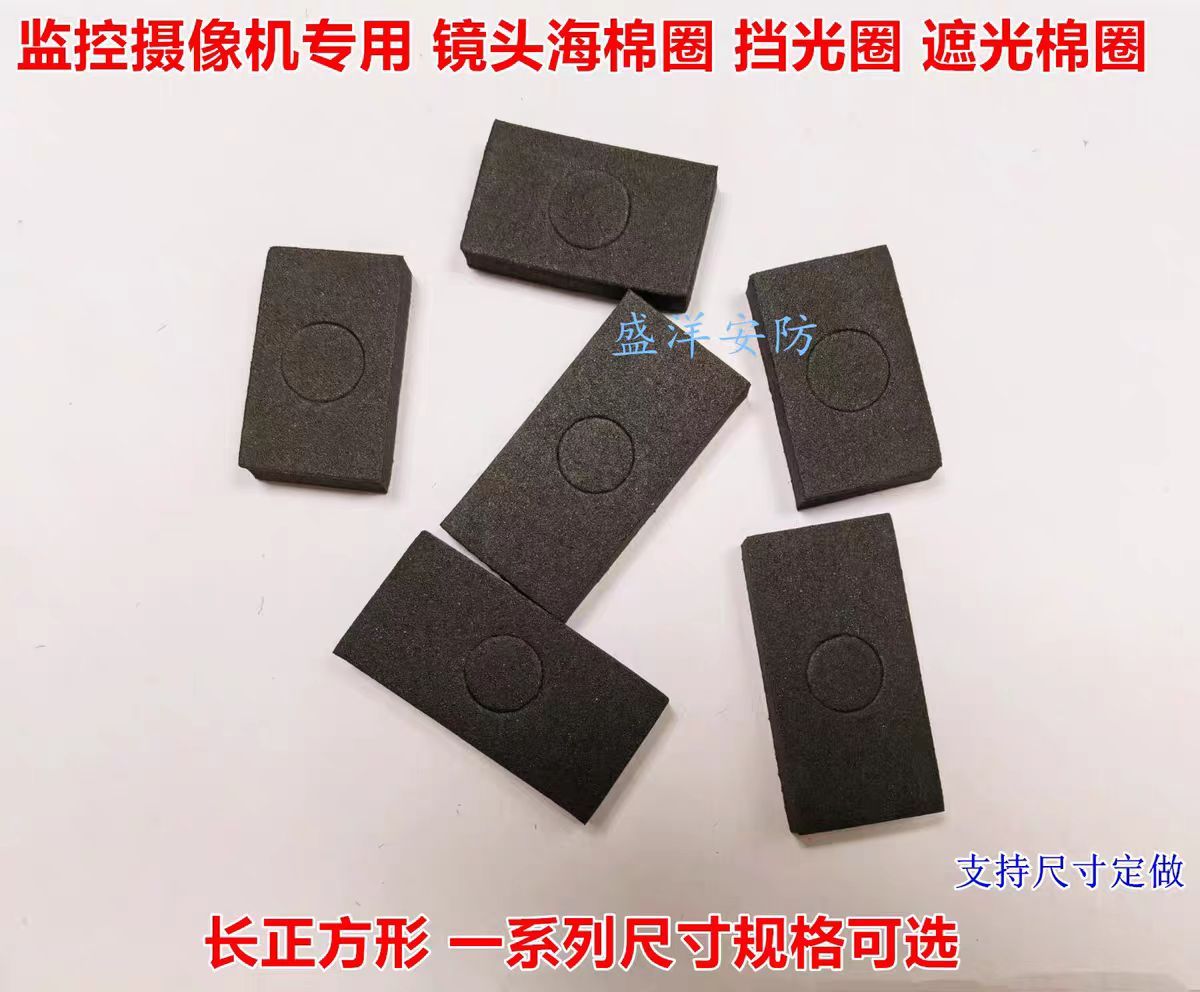
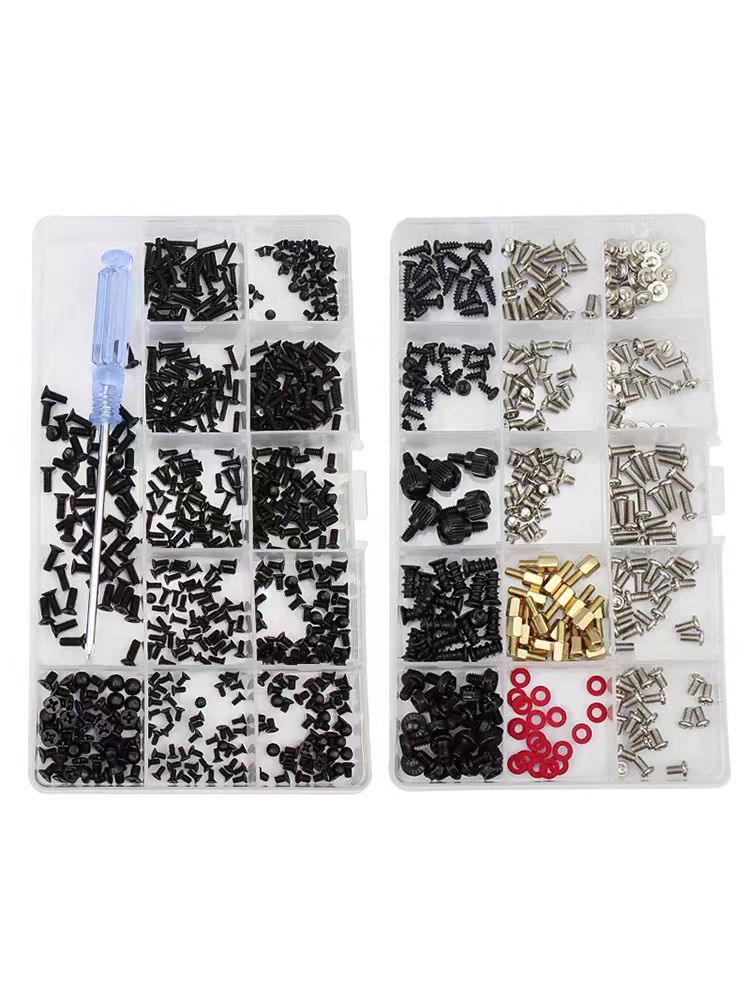
7、其他配件(亚克力板自己切或让某宝切好,主要固定树莓派主板),SD卡买C10以上的速率




-
@veye_xumm 已经安装在乡下了,请问如何设置白天、晚上自动转相机参数? 是用PY脚本?还是SH脚本?
晚上需要帧率1/25 或1/30 ,NTSC,宽广度关闭,自动白平衡、对比度50%等等
-
@fuhesong
你可以写一个脚本,调用我们提供的这个i2c脚本,实现参数的配置。
https://wiki.veye.cc/index.php/VEYE-MIPI-290/327_i2c/ -
